When shooting from a traditional head-on perspective, your photographs can sometimes feel static. This is where the 3/4 view comes in – a versatile technique that offers a unique way to compose and capture your subjects. By positioning yourself at an angle of approximately 45 degrees to one side of your subject, you create a more dynamic image with depth and interest. The 3/4 view allows you to frame your subject’s body or face in a more natural way, often resulting in more engaging and relatable portraits. Whether you’re aiming for a candid feel or want to add some visual intrigue to your still-life shots, the 3/4 view is an essential technique to master. In this article, we’ll explore how to incorporate the 3/4 view into your photography practice, enhancing composition and capturing unique perspectives with experimentation. By the end of it, you’ll be able to confidently experiment with this technique in your own photography.
What is a 3/4 View?
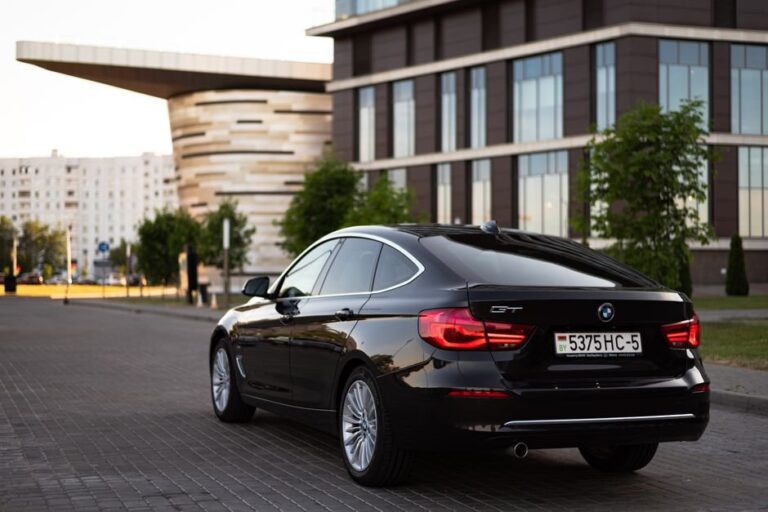
A 3/4 view, also known as three-quarter view, is a popular camera angle used to capture portraits and close-up shots. It’s an essential concept for photographers to understand.
The Concept of 3/4 View
The 3/4 view is achieved when you position yourself at a slight angle to your subject, rather than directly facing it. This off-center perspective creates an interesting composition and draws attention to specific aspects of the object or person being photographed. By not placing the subject directly in the center of the frame, you allow the viewer’s eye to move around the image, creating a more dynamic visual experience.
When capturing a 3/4 view, consider the unique features or characteristics that you want to emphasize. For example, if photographing a portrait, positioning yourself at a 45-degree angle can create a sense of intimacy and put emphasis on the subject’s eyes. In landscape photography, a 3/4 view can help draw attention to architectural details or interesting textures.
A key aspect of the 3/4 view is that it creates depth in an image by using negative space effectively. By placing your subject at an angle, you create visual interest and guide the viewer’s eye through the frame. Experiment with different angles and positions to find what works best for your subject and composition.
Types of 3/4 Views
When shooting a 3/4 view, it’s essential to understand that there are two primary variations of this composition. The first type involves positioning the camera at a slight angle to the left side of the subject, while the second variation places the camera at a slight angle to the right side. This subtle difference can greatly impact the overall mood and feel of the image.
To illustrate this point, consider a portrait photographer shooting a client from the left side. The resulting 3/4 view will create a sense of intimacy and informality, making the subject appear more relaxed in front of the camera. In contrast, shooting from the right side can create a more formal or even confrontational atmosphere.
Understanding these variations is crucial to executing this composition effectively. By being aware of the different types of 3/4 views, photographers can make informed decisions about their shot list and plan ahead for specific lighting setups and backgrounds that will enhance the desired mood. Experimenting with both left- and right-side angles can help you develop a deeper understanding of how to use the 3/4 view in your photography practice.
When to Use a 3/4 View
When to use a 3/4 view is crucial for capturing compelling photographs. This perspective can add drama and emphasize textures by placing the subject off-center, creating visual interest. For example, in portrait photography, a 3/4 view can create a sense of intimacy by framing the subject’s face with negative space on one side. This composition also highlights facial features and expressions, making it ideal for capturing candid moments.
In landscape and architecture photography, a 3/4 view can emphasize textures and patterns found in building facades or natural environments. By angling your camera to capture these details, you can create visually striking images that reward close examination. To achieve this effect, experiment with different vantage points and composition techniques to isolate the subject’s most interesting features.
In addition to adding drama and emphasizing textures, a 3/4 view can also be used to create a sense of depth and layering in your photographs. By placing elements off-center, you can create a visual hierarchy that draws the viewer’s eye through the image. This composition technique is particularly effective when combined with leading lines and shapes to guide the viewer’s gaze.
Composition Techniques for 3/4 Views
When working with a 3/4 view, composition techniques can make or break the impact of your image. We’ll explore some essential tips to help you capture compelling photos from this unique angle.
Leading Lines and Shapes
In a 3/4 view composition, leading lines and shapes play a crucial role in guiding the viewer’s attention towards specific parts of the image. These visual elements can be found in various forms, such as roads, paths, shorelines, or architectural features, that converge at the subject or lead the eye towards it.
When using leading lines, consider the direction they take and how they relate to the subject. For example, a road that leads directly to the subject’s face can create a strong sense of depth and draw attention to their eyes. Conversely, a shoreline that curves around the subject can create a sense of dynamism and movement.
Shapes, on the other hand, can be used to add visual interest and balance to the composition. Look for shapes like archways, doorways, or windows that frame the subject or provide depth cues. For instance, an archway leading into a building can create a sense of space and draw attention to the subject standing in it.
To effectively use leading lines and shapes, pay attention to their placement and orientation within the composition. Consider how they intersect with other elements and whether they create visual tension or balance.
Depth Perception and Layering
To create a visually appealing 3/4 view, you need to play with depth perception and layering. This can be achieved by placing elements at different distances from the camera, creating a sense of depth and dimensionality in your image. For instance, if you’re photographing a subject in front of a background, consider placing the most important element in the foreground and then gradually adding layers of detail in the mid-ground and background.
Use negative space to separate elements and create visual hierarchy. You can also use objects or textures in the scene to add depth cues, such as a row of trees, a wall with different levels of depth, or even a layer of fog or mist that creates an atmosphere. Experiment with using the 3/4 view to capture scenes with multiple layers, like cityscapes, landscapes, or interior spaces.
To effectively use depth perception and layering in your 3/4 views, consider these tips:
- Vary the distance between elements to create a sense of depth.
- Use objects or textures to add depth cues.
- Play with negative space to separate elements.
- Experiment with scenes that have multiple layers.
Balancing Elements
When balancing elements within a 3/4 view composition, consider the rule of thirds. Divide the frame into thirds both horizontally and vertically, placing important features along these lines or at their intersections. This helps create visually appealing compositions by avoiding centering subjects directly.
Symmetry can also be an effective balancing technique in 3/4 views. Reflective surfaces like water or glass provide natural symmetry opportunities. You can use this to your advantage by placing the main subject off-center, allowing it to reflect and create a sense of balance within the frame.
To achieve balance through symmetry, try experimenting with reflective surfaces and clever placement of subjects. For example, place a person in front of a window or a pool of water to create a mirrored effect that adds depth and visual interest to your composition. Balance can also be achieved by using negative space effectively – remove distracting elements from the scene to let the main subject shine.
When balancing elements, remember that there’s no one-size-fits-all approach. Experiment with different techniques to find what works best for your specific image.
Camera Settings for 3/4 Views
When capturing a 3/4 view, getting your camera settings just right is crucial to avoid awkwardly posed subjects and unflattering angles. Let’s discuss the ideal aperture, shutter speed, and ISO for this unique perspective.
Focusing on the Subject
When composing a 3/4 view, it’s essential to maintain sharp focus on your subject despite its off-center position. This requires deliberate technique and attention to camera settings. To achieve accurate focusing, start by setting the camera to autofocus (AF) mode. However, this can sometimes lead to issues with depth of field in 3/4 views.
A better approach is to switch to manual focus (MF), allowing you to precisely control where the subject falls within the depth of field. When using MF, use live view or magnification to visually inspect the image and adjust the focus accordingly. This can be particularly helpful when working with shallow depth of field, as it enables you to place your subject at the optimal focal point.
In cases where multiple subjects are present in a 3/4 view, prioritize focusing on the main subject first. You may need to use techniques like back-button focus or focus stacking to achieve the desired effect.
Aperture and Depth of Field
When it comes to capturing a 3/4 view, understanding how to control depth of field is crucial. Aperture plays a significant role in determining what’s in focus and what’s blurred. A wider aperture (lower f-stop number) will create a shallow depth of field, where the subject is sharp and the background is soft. This can be beneficial for isolating your subject from distracting elements.
For example, if you’re photographing a person with a 3/4 view, using an aperture of f/2.8 or wider will help separate them from the surrounding environment. However, be cautious not to overdo it – too wide an aperture may make the background overly blurred and unrecognizable.
A narrower aperture (higher f-stop number), on the other hand, creates a deeper depth of field, where more elements are in focus. This can be useful for capturing detailed scenes or when working with multiple subjects. Experimenting with different apertures will help you develop an understanding of how to use depth of field to your advantage in 3/4 views.
When setting aperture for 3/4 views, consider the scene’s complexity and your desired outcome. Use a shallow depth of field to isolate your subject or a deeper depth of field to capture more detail.
Shutter Speed and Motion Blur
When capturing a 3/4 view, controlling motion blur can make or break the image. Shutter speed plays a crucial role in achieving the desired effect. Faster shutter speeds freeze movement, while slower ones create deliberate blur. The ideal shutter speed depends on the type of scene and subject matter.
For example, when photographing a sports event from a 3/4 view, you might use a fast shutter speed (1/1000th of a second or faster) to capture sharp images of athletes in motion. In contrast, when shooting a serene landscape with gentle water features, a slower shutter speed (around 1-2 seconds) can create beautiful blur and convey a sense of movement.
To freeze movement effectively, consider using a shutter speed between 1/500th and 1/1000th of a second. For more creative blur effects, try slower speeds ranging from 1 to 10 seconds. Keep in mind that slower speeds may require a tripod or stabilizer to prevent camera shake.
In practice, experimenting with different shutter speeds can help you develop an intuitive sense for what works best in various situations. Pay attention to the results and adjust your settings accordingly. This will allow you to capture dynamic images from 3/4 views while controlling motion blur effectively.
Mastering the 3/4 View in Real-World Situations
When you’re working on a photoshoot, understanding how to capture the perfect 3/4 view is crucial for conveying emotion and telling a story. Let’s explore practical applications of this technique in real-world photography scenarios.
Portrait Photography
When applying the principles of the 3/4 view to portrait photography, you’re not just capturing a subject’s likeness – you’re revealing their unique personality and essence. In portraits, the 3/4 view often emphasizes one side of the face, creating an asymmetrical balance that draws attention to specific features.
To emphasize this, focus on the subject’s eyes, nose, or mouth, placing them slightly off-center in the frame. This can create a more dynamic composition, allowing you to capture their personality through subtle expressions and angles. For instance, if your subject has distinctive facial hair or a striking scar, positioning yourself at a 3/4 view can highlight these features.
In terms of camera settings, experiment with wider apertures (around f/2.8) to create a shallow depth of field that isolates the subject’s face from the surrounding environment. This will help you focus attention on their expression and individuality rather than any background distractions. Pay close attention to your subject’s posture and body language as well, using the 3/4 view to subtly convey their personality through gentle lean or relaxed poses.
Landscape and Architecture Photography
When photographing landscapes, using the 3/4 view can draw attention to unique features and textures. Focus on capturing the intricate details of a rocky outcropping, a weathered wooden beam, or a patchwork of crops. This perspective allows you to frame the subject in a way that emphasizes its relationship with the surrounding environment.
In landscape photography, experiment with placing your subject at an angle, such as shooting a mountain range from the side rather than directly from the front. This can create a sense of dynamism and energy in your image. For example, capturing a 3/4 view of a towering mountain can emphasize its rugged, imposing presence.
Architecture photography benefits from the 3/4 view as well, particularly when trying to add depth to structures or highlight distinctive architectural features. Use this perspective to focus on the interplay between light and shadow, highlighting the textures and patterns that make each building unique. Avoid shooting directly from the side, which can result in a flat, uninteresting image – instead, experiment with placing your camera at an angle to capture the complex relationships between different elements of the scene.
Street Photography
When capturing street photography with a 3/4 view, focus on the interaction between people. This perspective allows you to freeze moments of connection and tension between subjects. Look for individuals engaged in conversations, gestures, or body language that convey their relationships.
A 3/4 view can help you frame a scene where one person is looking directly at another, creating a sense of intimacy and involvement. Experiment with different angles to emphasize the interaction – slightly above or below the subject’s eye level can add drama and visual interest. Consider framing your shot so that the viewer is positioned in the space between two people, making them feel like they’re part of the scene.
To capture these moments effectively, be aware of your surroundings and anticipate interactions between strangers. Look for clues such as people checking their watches or glancing at each other’s belongings – these can signal a potential interaction worth capturing. Keep your camera settings flexible to adapt to changing situations. Focus on the main subject while keeping the surrounding context in mind, using aperture and depth of field to emphasize the connection between individuals.
Common Mistakes to Avoid
A common mistake many photographers make when working with the 3/4 view is neglecting to adjust their composition for the subject’s placement, which can lead to a less-than-flattering image. Let’s examine some specific mistakes you’ll want to avoid in this scenario.
Overlooking the Rule of Thirds
Neglecting the rule of thirds can be a significant compositional mistake when working with 3/4 views. This fundamental principle guides photographers to place important elements off-center, creating a more balanced and visually appealing image. In the context of 3/4 views, applying the rule of thirds ensures that the subject’s placement is thoughtful and deliberate.
When the rule of thirds is overlooked, the composition can become static and predictable. The viewer’s eye may focus too much on the center of the frame, rather than being guided through the image by a more dynamic placement of elements. For example, in a 3/4 portrait shot, placing the subject’s shoulder or face along one of the grid lines created by the rule of thirds can add depth and interest to the composition.
To avoid this mistake, remember that the rule of thirds is not a hard-and-fast rule – it’s a guideline that should be adapted to suit your specific scene. Experiment with different placements of your subject within the frame, using the rule of thirds as a starting point to create more engaging 3/4 views.
Ignoring Negative Space
When working with a 3/4 view, it’s easy to overlook negative space. This is a critical mistake, as balanced composition relies on thoughtful consideration of both subject and background. In a 3/4 view, the subject often fills most of the frame, but that doesn’t mean you should ignore what lies beyond. Negative space provides visual breathing room and helps draw attention back to your subject.
To illustrate this point, consider a portrait photographer capturing a head-and-shoulders shot. A cluttered or distracting background can make the image feel cramped and overwhelming. Conversely, a clean, minimalist backdrop allows the subject’s features to take center stage. In landscape photography, negative space can be used to create a sense of depth and context.
A common mistake is to fill every inch of the frame with elements, thinking that more is better. However, this approach often leads to visual noise and confusion. Instead, intentionally leave some empty space around your subject to create balance and guide the viewer’s eye. This can be achieved by adjusting your camera position or using a shallow depth of field to isolate the subject from the background. By acknowledging and leveraging negative space, you’ll elevate your 3/4 view compositions and create more visually appealing images.
Tips for Practice and Improvement
As you become more comfortable with the 3/4 view, it’s time to focus on refining your technique through consistent practice and experimentation. Here are some actionable tips to help you improve your skills.
Experimentation and Patience
Mastering the 3/4 view requires more than just technical knowledge of camera settings and composition techniques. It demands practice to develop muscle memory, allowing you to instinctively position your subject within the frame. Experimentation is key to finding what works for you and your unique style.
Try experimenting with different variations of the 3/4 view in low-pressure situations before applying it to real-world scenarios. For instance, set up a still-life composition or practice on a friend or family member. Focus on getting the angle right, adjusting your camera position until the subject’s shoulders or hips are at the edge of the frame.
It’s not just about achieving perfection; patience is essential in refining your skills. Don’t be discouraged if it takes time to feel comfortable with the 3/4 view. You’ll likely encounter instances where the shot doesn’t quite come together as planned, but persistence will pay off. Set aside dedicated time for practicing and experimenting with different compositions, allowing yourself space to refine your approach.
Keep a record of your experiments, noting what worked well and what didn’t. This self-reflection will help you identify areas for improvement, streamlining your practice sessions and accelerating your progress in mastering the 3/4 view.
Post-Processing and Editing
Post-processing and editing play a significant role in refining your 3/4 views. A well-executed post-processing technique can elevate the visual impact of your images, making them more engaging and polished. When working with 3/4 views, it’s essential to balance exposure and contrast to create a visually appealing image.
In Adobe Lightroom or Photoshop, you can start by adjusting the exposure and contrast of your image. This will help to bring out the details in both the subject and the background. Be cautious not to overdo it, as this can lead to an unnatural look.
Another crucial step is noise reduction. Since 3/4 views often involve capturing subjects with varying levels of lighting, noise can become a significant issue. Using tools like the Detail panel in Lightroom or the Noise Reduction filter in Photoshop can help minimize the appearance of noise and create a cleaner image.
Finally, pay attention to color grading. A 3/4 view benefits from a more subtle color palette, which can be achieved by reducing the vibrance and saturation of your image. This will help maintain the natural tones of the scene while avoiding an overly processed look.
Conclusion
The 3/4 view is a versatile and iconic perspective in photography, capable of capturing compelling stories and emotions. By now, you should have a solid understanding of this viewpoint’s unique characteristics and applications. When approaching your next photo shoot, consider the context and atmosphere you want to convey – will it be dramatic and intense or calm and serene? To effectively utilize the 3/4 view, think about the placement of your subject within the frame: does it dominate the space or share it with its surroundings? Experimenting with different angles and compositions can help you achieve a more dynamic result. Ultimately, mastering the 3/4 view requires patience and practice; don’t be discouraged if your initial attempts don’t yield the desired outcome – keep experimenting until you find the right balance of composition and storytelling.
Frequently Asked Questions
Can I use a 3/4 view with any type of camera or lens?
Yes, the 3/4 view is versatile and can be applied to various cameras and lenses. The key is understanding how to adjust your composition and settings for optimal results.
How do I balance the 3/4 view with negative space in busy scenes?
To achieve a balanced 3/4 view in busy scenes, focus on selecting a subject that stands out from the surroundings. Use leading lines or shapes to guide the viewer’s attention towards your chosen subject. Balance elements within the frame using compositional techniques like symmetry.
What if I’m struggling to capture sharp images with the 3/4 view – what could be going wrong?
If you’re experiencing difficulty capturing sharp images, it may be due to incorrect focusing or aperture settings. Mastering the art of focusing on subjects in a 3/4 view requires practice and patience. Experiment with different techniques, such as using the focus peaking feature or adjusting your aperture.
How can I apply the 3/4 view to capture unique portraits, especially when working with people who are uncomfortable with their image being taken?
When photographing people, it’s essential to establish trust and communication. Approach portrait photography by focusing on capturing the subject’s personality rather than just their physical appearance. Use the 3/4 view to emphasize unique aspects of your subject’s expression or posture.
Can I use the 3/4 view for low-light scenes, or are there specific settings I should follow?
Yes, you can apply the 3/4 view in low-light scenes by using a wide aperture (small f-stop number) to control depth of field. Experiment with different shutter speeds and ISO settings to achieve the desired effect while minimizing noise.