Drawing a simple frog might seem like an easy task, but getting those proportions just right can be tricky. Even slight mistakes in basic shapes or proportions can throw off the entire drawing. As a beginner, it’s common to struggle with creating realistic representations of animals, and frogs are no exception. To improve your drawing skills, let’s break down the process into manageable steps. This guide will cover the fundamental principles of simple frog drawing, including how to use basic shapes to create form, achieve accurate proportions, and add advanced details for a more realistic look. With practice, you’ll be able to draw a simple yet convincing frog using our step-by-step instructions.
Getting Started with Frog Drawing
To get started with drawing a simple frog, begin by understanding its basic shape and proportions, which is where we’ll start our journey together. Let’s break down this iconic creature into easy-to-draw parts.
Understanding Basic Shapes and Proportions
To draw a simple frog, it’s essential to understand its basic shape and proportions. Start by breaking down the body into simple geometric shapes: a large oval for the torso, a smaller oval for the head, and a series of connected circles for the limbs. Pay attention to the position of these shapes in relation to each other – the torso should be slightly larger than the head, and the legs should be roughly the same length.
Notice how the frog’s body is roughly 2-3 times longer than it is wide. This ratio helps create a balanced composition. You can also visualize the frog’s proportions by comparing it to a simple oval shape: imagine dividing an oval into five equal parts – the head would occupy about one part, and the torso would take up three.
When drawing, keep these basic shapes in mind as you work on each section of the body. This will help you maintain consistency and create a believable frog-like form. For example, if you’re sketching the legs, remember that they should be roughly the same length, with the front legs slightly thicker than the back legs.
Familiarizing Yourself with Reference Images
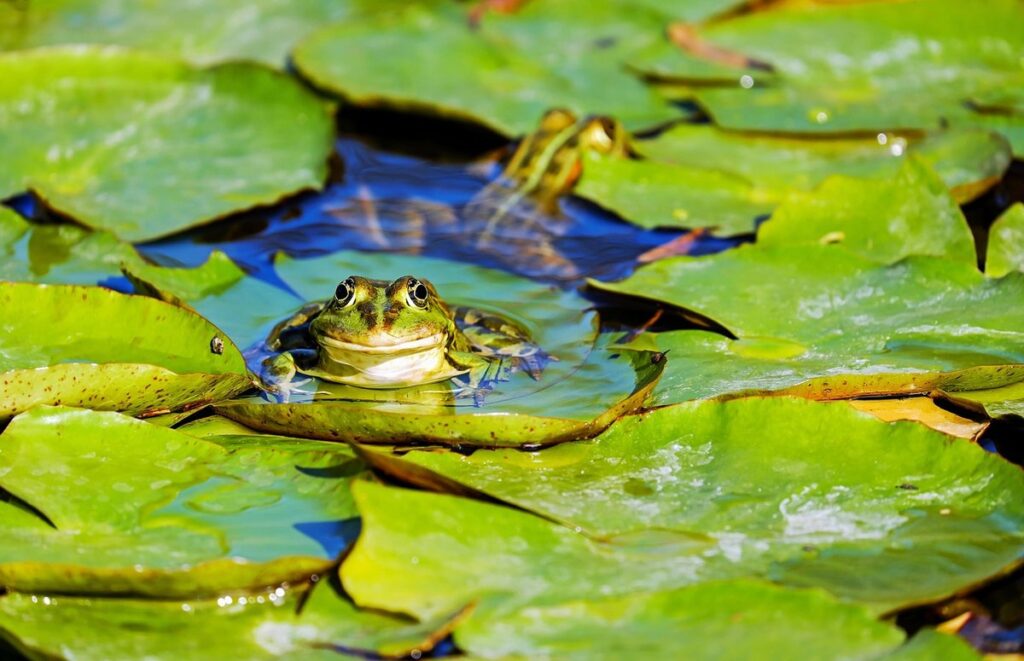
Reference images are a crucial tool when drawing frogs, especially when it comes to capturing their intricate features. A well-chosen reference image can help you accurately draw the shape of the frog’s eyes, the texture of its skin, and even the subtle nuances of its facial expression.
When selecting reference images, look for ones that showcase a frog from multiple angles. This will give you a more comprehensive understanding of the frog’s overall structure and proportions. You can find reference images online or in books, or take your own photos of frogs in real-life settings.
A good reference image should be clear and detailed enough to allow you to observe the frog’s features closely. Pay attention to the shape and size of the eyes, the curve of the nose, and the texture of the skin. You can even use a magnifying glass or zoom in on your screen to get an even closer look.
Having multiple reference images will also help you spot any inconsistencies between them. For example, some frogs may have larger or more rounded eyes than others. By comparing different images, you’ll be able to identify the common characteristics that define a particular species of frog.
Basic Frog Body Structure
To get started on drawing a realistic frog, it’s essential to understand its basic body structure. Begin by learning how to draw a frog‘s distinctive body parts, including its legs and torso.
Drawing the Head and Facial Features
When drawing a frog’s head, start by positioning it slightly above the center of the body. The eyes are crucial, so place them about one-third of the way down from the top of the head and roughly aligned with the top edges of the nostrils. Ensure they’re evenly spaced and about the same size.
The nose is usually small and tucked between the eyes, while the mouth is a horizontal slit below it. Keep in mind that frogs have no discernible chin or jawline, so avoid adding these features.
Maintaining proportion is vital when drawing the head and body relationship. A good rule of thumb is to allocate about one-quarter of the frog’s total height to its head. This will help you achieve a balanced composition.
For beginners, it might be helpful to sketch the head in profile first, then add the facial features later on. Practice this step with simple reference images to get a sense of how the proportions and placement work together. Remember that frogs come in different shapes and sizes, but the basic head structure remains relatively consistent across species.
Sketching the Torso and Limbs
The torso and limbs of a frog are relatively easy to draw once you understand their basic proportions. To start, recall that frogs have four limbs: two front legs and two back legs. The front legs are slightly smaller than the hind legs, but not significantly so. When sketching these limbs, pay attention to their relative lengths in relation to the body as a whole.
The arms (front legs) should be roughly equal in length to one another, with a slight taper at the wrist area. They attach directly to the torso, just below the neck. The hind legs are slightly longer and thicker than the front legs. Notice how they curve gently outward from the body before meeting the ground.
To ensure accuracy, it’s essential to maintain consistent proportions throughout your drawing. A simple trick is to measure out equal segments on either side of the body and use these as guides for where each limb should begin. This approach will help you achieve a balanced composition that accurately reflects the frog’s anatomy. Remember, practice makes perfect – don’t be discouraged if it takes a few attempts to get the proportions right!
Advanced Techniques for Realism
To take your simple frog drawing to the next level, we’ll explore advanced techniques that add depth and dimensionality to your artwork. This includes subtle shading and texture effects.
Adding Textures and Patterns
When adding textures and patterns to your frog drawing, think about the subtle nuances of its skin. Observe how some frogs have small, scattered bumps on their backs or throats, which can be achieved with short, curved lines. These feather-like structures are a key characteristic of many species.
To replicate this texture, try using a range of line weights and varying the pressure on your pencil. Start by sketching loose, irregular shapes to suggest the pattern’s overall shape and placement. Then, add smaller bumps within these areas using shorter, more expressive lines.
Another technique is to draw small, rounded scales that cover the frog’s body. These can be depicted as small circles or oval shapes, often overlapping one another to create a cohesive texture. Vary the size and spacing of these scales to convey different levels of detail. Remember, it’s not about drawing every individual scale – focus on capturing their overall arrangement and pattern.
Consider studying reference images of various frog species, noting how they display unique textures and patterns. This will help you develop your observation skills and incorporate more realistic details into your drawings.
Capturing Eye Details and Expressions
When drawing a frog’s eyes, it’s essential to capture their unique details and expressions. The shape of the pupils is often rounded, but can also be slightly elongated. Notice how light reflects off the surface of the eyes, creating a sense of depth and dimensionality.
Pay attention to the size and placement of the pupils in relation to the overall face. A small pupil will make the frog look alert or surprised, while a larger one may give it a more relaxed appearance. The iris itself can be a deep shade of brown or even golden, depending on the species.
To accurately depict a frog’s eyes, observe how light affects their shape and texture. Notice the slight indentation at the top of the eye, which can add to its rounded appearance. You can also capture the way the eyelids curve slightly outward, creating a subtle crease.
When drawing the eyelids themselves, keep in mind that they’re often thin and translucent. This means you can see the shape of the eye beneath, adding to its sense of realism. By paying attention to these details, you’ll be able to capture a frog’s unique eye characteristics and expressions, making your drawings more lifelike and engaging.
Drawing Different Frog Species
Now that you’ve mastered drawing a basic frog, let’s add some personality to your artwork by learning how to draw different species. From tiny poison darts to large bullfrogs, we’ll explore their unique characteristics.
Characteristics Unique to Each Species
When drawing different frog species, it’s essential to note their unique characteristics. The Red-Eyed Tree Frog has striking red eyes and a distinctive blue stripe on its back, which can be depicted with bold lines and vibrant colors. In contrast, the Poison Dart Frog boasts an array of bright hues and intricate patterns on its skin, requiring attention to detail and subtle color gradations.
The American Bullfrog is larger in size compared to other species, with a broad head and short legs that should be sketched accordingly. The Australian Green Tree Frog, on the other hand, has webbed feet and a more slender build, necessitating a longer torso and shorter limbs.
Some key considerations when drawing specific species include their typical habitats and behaviors. For instance, the Red-Eyed Tree Frog is often found in tropical rainforests, so its environment can be suggested by incorporating lush foliage and a misty atmosphere. By studying reference images and taking note of these distinctive traits, you’ll be better equipped to capture the essence of each frog species on paper.
Special Considerations for Specific Species
When drawing certain frog species, it’s essential to consider their unique features and requirements. For instance, the Red-Eyed Tree Frog is known for its vibrant coloration and distinctive eye spots. To capture these characteristics accurately, focus on creating a subtle gradient effect with soft pencils or digital brushes. This will help convey the delicate patterns on their skin.
Some species, like the Poison Dart Frog, have strikingly bold markings. However, be cautious not to exaggerate these features, as they can quickly become cartoonish. Instead, aim for a more understated approach by emphasizing the gentle curves of their bodies and subtle texture variations.
Another challenge is drawing the African Clawed Frog’s robust build and webbed feet. To achieve this, pay close attention to the proportion of their limbs and torso. Use gentle, sweeping strokes to suggest the soft folds of skin between their toes.
When working with these species, remember that subtlety often yields more realistic results than bold, dramatic strokes. By focusing on capturing their unique textures and features, you’ll be able to create a more accurate representation of each frog’s distinctive character.
Tips and Tricks for Improvement
Wanting to take your simple frog drawing to the next level? This section shares expert tips on how to improve your technique and create more realistic, detailed drawings.
Practice Exercises to Refine Skills
Practice exercises can be tailored to specific areas where you need improvement. For example, if you struggle with drawing frog legs, try sketching just one leg multiple times from different angles until it feels comfortable. You can also practice drawing a complete frog and then focusing on just one aspect – such as the eyes or texture of the skin.
To improve your proportions, draw a simple grid on paper and use it to help you place facial features in relation to each other. Measure the size of the head, eyes, and nose using simple shapes like circles and rectangles. You can also practice drawing different species of frogs to become familiar with their unique characteristics.
For added challenge, try drawing a frog from memory without looking at reference images. This will help you develop your observation skills and remember key features more accurately. Remember that practice is not about creating perfect drawings but about developing muscle memory and confidence in your abilities.
Common Mistakes and How to Avoid Them
When drawing frogs, many beginners make a few common mistakes that can be corrected with practice and attention to detail. One of the most frequent errors is misproportioning the frog’s body. To avoid this, take note of the frog’s overall shape: it should have a rounded torso, long legs, and a relatively large head. If your drawing looks more like a blob than a frog, reevaluate your proportions.
Another common mistake is not paying enough attention to facial features. Frogs have distinct eyes, nostrils, and mouth shapes that can greatly impact the overall realism of the drawing. To draw accurate facial features, study reference images or observe real frogs up close.
Inaccurate limb placement is also a frequent error. Make sure to place the front legs slightly in front of the back legs and pay attention to the way the frog’s body weight is distributed on its hind legs. You can also check your drawing by imagining how the frog would move – would it be standing with its front legs forward or backward?
By being mindful of these common mistakes, you’ll improve your drawing skills and develop a more realistic representation of frogs in your artwork.
Frequently Asked Questions
If you have any questions about drawing a simple frog, we’ve got you covered! This section answers the most common queries and provides additional guidance for your creative journey.
Q: What is the Best Way to Practice Drawing Frogs?
To become proficient at drawing frogs, regular practice is essential. Reviewing exercises from previous sections can help you develop muscle memory and improve your skills. Focus on simple shapes and proportions to get a feel for the frog’s overall structure. Try sketching the basic body shape, then gradually add details like facial features or textures.
When practicing, set aside time each day or week to work on drawing frogs. This could be as short as 15-20 minutes per session. Consistency is key when developing your skills. As you become more comfortable with simple shapes and proportions, move on to exercises that focus on specific areas like facial features or limb structure.
Incorporate variety into your practice by drawing different frog species or trying various techniques, such as hatching or stippling. Experimenting with different media can also help you discover what works best for you.
Q: Can I Use Digital Tools for Frog Drawing?
You can use digital tools to create frog drawings, but it’s essential to understand their limitations. One advantage of digital tools is the ability to easily correct mistakes and experiment with different designs without wasting paper or ink. Digital drawing programs like Adobe Illustrator or Procreate offer a range of brush styles, textures, and effects that can enhance your artwork.
However, traditional media often provides a more tactile experience that can be beneficial for beginners. With traditional media, you can develop fine motor skills and hand-eye coordination through the physical act of drawing. Additionally, traditional media allows for a more direct connection with the artwork, as you can see the frog’s features emerge on paper in real-time.
If you do choose to use digital tools, consider starting with simple exercises like drawing individual body parts or practicing basic shapes. This will help you get accustomed to using the software and build your skills before moving on to more complex projects. Some popular digital drawing programs also offer beginner-friendly tutorials and resources that can guide you through the process.
Frequently Asked Questions
Q: Can I Mix and Match Techniques from Different Frog Species?
Yes, with practice and patience, it’s possible to combine techniques learned from drawing different frog species. However, be mindful of the unique characteristics that make each species distinct. Experimenting with mixed styles can help you develop a more versatile approach to drawing frogs.
Q: How Do I Know When My Frog Drawing is Proportional?
To ensure your frog’s proportions are accurate, use reference images and regularly check your drawing against the guidelines provided in the “Basic Frog Body Structure” section of our guide. Pay attention to the relationship between the head, torso, arms, and legs, making adjustments as needed to achieve a balanced and natural look.
Q: What if I’m Having Trouble Capturing Realistic Eye Details?
Yes, it can be challenging to depict realistic eye details in your frog drawings. To overcome this, focus on studying reference images of frogs’ eyes and practice drawing the shape, size, and pupil placement accurately. Experiment with different techniques for capturing light reflections and textures around the eyes.
Q: Can I Use Colored Pencils or Markers for Frog Drawing?
Yes, you can use colored pencils or markers to add color and texture to your frog drawings. However, be aware that these mediums may require more practice and patience than traditional drawing tools. Experiment with different brands and techniques to achieve the desired effect.
Q: How Do I Decide Which Species of Frog to Draw First?
When choosing which species of frog to draw first, consider the characteristics and features unique to each species. If you’re new to drawing frogs, start with a commonly depicted species like the African clawed frog or the American bullfrog, as they have more straightforward proportions and features.