Drawing wolves can seem intimidating at first, but with some basic guidance, you can create stunning art. Many artists struggle to draw realistic wolves because they don’t know where to start or how to balance their features. Mastering wolf drawing is more than just creating a cute animal – it’s about capturing the essence of these majestic creatures. To get started, you need to break down the wolf into basic shapes and understand its anatomy. By focusing on simple forms and proportions, you’ll be able to draw wolves with ease. This guide will walk you through the process, covering essential techniques for creating realistic eyes, fur texture, and movement in your drawings. By the end of this beginner’s guide, you’ll be able to confidently draw wolves with a natural look.
Getting Started with Wolf Drawing
First, let’s establish a solid foundation by learning how to draw a wolf‘s basic body shape and proportions. This will help you build a strong starting point for your artwork.
Understanding Basic Shapes and Lines
When drawing wolves, it’s essential to start with the basics: understanding shapes and lines. Begin by recognizing that a wolf’s body can be broken down into basic geometric forms like circles, ovals, and rectangles. The head is often an oval or slightly flattened circle, while the body is typically a combination of rectangular and triangular shapes. Understanding these simple forms will help you capture the overall proportions and structure of your wolf drawing.
Lines are just as crucial as shapes in creating a believable wolf portrait. You’ll need to use straight lines for the outline of the ears, curved lines for the contours of the face and body, and diagonal lines for the legs and tail. Practice drawing these different types of lines separately before attempting to combine them into a cohesive whole.
To get a better sense of proportions, try sketching simple shapes over a reference image of a wolf’s body. This will help you understand how each part relates to the others and allow you to make more accurate drawings in the future. Pay particular attention to the relationship between the head, neck, and body – this is often where beginners struggle to get the proportions right.
Familiarizing Yourself with Reference Images
Reference images are essential tools for creating accurate and detailed wolf drawings. They provide a wealth of information about the subject’s anatomy, proportions, and features, allowing you to observe and learn from real-life examples. When searching for reference images, consider websites like National Geographic or online archives that offer high-quality photos of wolves in various settings.
To use reference images effectively, look for clear, well-lit shots that showcase the wolf’s fur texture, muscle structure, and facial expressions. Take note of the lighting conditions, as this can greatly impact the overall mood and atmosphere of your drawing. You can also create your own reference images by taking photos of wolves in zoos or wildlife sanctuaries.
When using reference images, try to find multiple views of the subject to get a more comprehensive understanding of its anatomy. For example, study a photo of a wolf’s face from different angles to capture its unique features and expressions. This approach will help you develop your observational skills and ensure that your drawings accurately represent the subject.
Mastering Wolf Anatomy
To create a realistic wolf drawing, it’s essential to understand the animal’s body structure, including its proportions and distinctive features. Let’s break down the key elements of a wolf’s anatomy.
Understanding Body Structure and Proportions
A wolf’s body structure is composed of a streamlined torso, long legs, and a bushy tail. The proportion of these elements is crucial for creating an accurate representation. In general, wolves are longer than they are tall, with the average length ranging from 4 to 6 feet (1.2 to 1.8 meters) and height around 2 to 3 feet (0.6 to 0.9 meters). The torso makes up about half of the wolf’s total body length.
Notice how the ears are positioned on the sides of the head, slightly above the eye level. They should be rounded at the tips and relatively small compared to the head. The tail is long and fluffy, often carried low but can be raised when alert or excited. When drawing a wolf’s paws, remember that they have five toes, with the dewclaw being non-retractable.
To better understand these proportions, look for reference images of wolves in various poses. Observe how their body shape changes depending on whether they’re walking, running, or standing still. Note that wolves have relatively long legs and a short back, which helps them move efficiently over long distances.
Recognizing Facial Features and Expressions
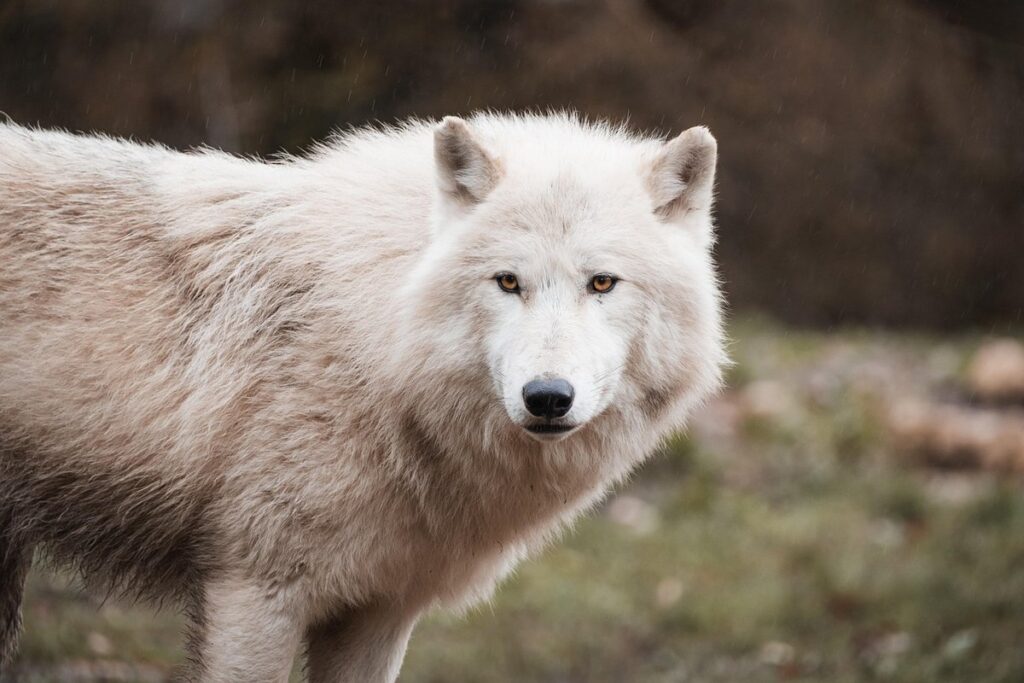
Wolves have distinctive facial features that can convey a range of emotions and expressions. To capture these effectively in your drawings, start by studying the shape and size of their eyes. Wolves’ eyes are relatively large compared to other canines, with a slight slant upwards at the outer corners. This gives them a unique, intelligent appearance.
The nose is another key feature, typically slightly rounded and set between the eyes. Pay attention to its position in relation to the rest of the face – it should be roughly centered, but not directly under the eyes. The mouth is usually relatively small, with a slight curve upwards at the corners. This can give the impression of a wolf’s calm or even friendly demeanor.
The ears are also crucial for conveying expression and mood. Wolves have triangular-shaped ears that are relatively large in proportion to their heads, which allows them to pinpoint sounds with ease. When drawing a wolf’s face, be sure to capture these facial features accurately, as they can greatly impact the overall emotion and character of your artwork.
To add depth and realism, consider how the light falls on the wolf’s face. Notice where shadows tend to fall and use this to guide your shading and value work.
Basic Drawing Techniques for Wolves
When it comes to drawing wolves, mastering basic techniques is essential to capture their majestic features and realistic expressions. Let’s start by learning how to draw a wolf’s body proportions and pose effectively.
Learning to Draw Fur and Texture
Drawing fur and texture is a crucial aspect of creating realistic wolf portraits. To start, it’s essential to understand the different types of fur found on wolves. Smooth fur is typically seen on the belly and face, while rough or thick fur covers the back and neck. Curly fur, often found on the paws and tail, adds a distinctive touch to your drawing.
When drawing smooth fur, use gentle, curved lines to suggest the direction of the hairs. Varying line weight can help create depth and dimension. For example, you might draw the fur on the wolf’s face with finer lines than on its belly. Rough or thick fur requires more expressive lines, often with a mix of short and long strokes.
To capture curly fur, use loose, spiral motions to suggest the texture. Pay attention to how the curls interact with one another, using gentle pressure to convey a sense of softness. Remember that different types of fur can blend together seamlessly in nature, so don’t be afraid to experiment with combining techniques to achieve a realistic look.
In practice, consider drawing the fur on your wolf model in sections or “patches,” building up layers of texture and detail gradually. This will help you maintain control over the lines and avoid overwhelming yourself with too much fine detail at once.
Mastering Shading and Value
When it comes to creating realistic wolf drawings, mastering shading and value is crucial. Shading refers to the dark areas on an object where light doesn’t reach, while value refers to the overall lightness or darkness of a particular area. By controlling these elements, you can add depth, dimension, and atmosphere to your drawings.
To create convincing shadows, start by observing the way light interacts with your wolf’s fur in reference images. Note how the shadowed areas are always darker than the surrounding fur, but never black. Use a range of values from dark grey to black to suggest these areas. For more subtle shading, try layering soft strokes of a medium or dark value over lighter areas.
Another technique is using atmospheric perspective to create depth in your drawing. This involves fading objects into the background as they recede into the distance. You can achieve this effect by gradually decreasing the value and contrast of an area as it moves away from the viewer. Remember that soft, hazy shadows often suggest a distant or misty atmosphere, while sharp, defined shadows imply closer proximity.
When working with value, keep in mind that warm colors (such as reds and oranges) tend to advance, while cool colors (like blues and greens) recede. This can help you create more convincing depth and dimension in your wolf drawings.
Intermediate Techniques for Advanced Drawers
Now that you’ve mastered the basics, it’s time to take your wolf drawings to the next level by learning advanced techniques such as layering and texture. This will help add depth and realism to your artwork.
Using Reference Points and Measuring Tools
When drawing wolves, it’s essential to use reference points and measuring tools to achieve accuracy and precision. To start, identify key landmarks on your wolf model or reference image, such as the base of the neck, the shoulder blades, and the hindquarters. These points serve as anchors for measuring and proportioning.
Use a ruler or measuring tool to ensure that these key features are in proportion to each other. For example, measure the distance between the nose tip and the eye socket to establish a consistent facial ratio. You can also use measurement tools to check the proportions of your wolf’s body parts, such as the length of the forelegs compared to the hind legs.
When using measuring tools, remember that it’s not about being overly precise – but rather finding a balance between accuracy and artistic freedom. As you work with reference points and measurements, practice trusting your instincts and making subtle adjustments to achieve a natural, fluid look. By mastering these intermediate techniques, you’ll be able to capture the subtleties of wolf anatomy and create drawings that are both accurate and visually appealing.
Creating Realistic Eyes and Facial Expressions
To capture the subtleties of a wolf’s expression and create lifelike eyes, pay close attention to the shape and structure of the face. Start by defining the overall curve of the muzzle, ensuring it follows a gentle, concave arc from the forehead to the nose. Notice how the lines around the eyes are subtly curved, creating a sense of depth and dimensionality.
When drawing the eyes themselves, use soft shading and subtle highlighting to convey emotion. A wolf’s eyes are often described as “golden” or “amber,” but this can be misleading – in reality, the iris is typically more complex, with flecks of darker color that appear like tiny freckles. Capture these subtleties by layering short, gentle strokes over a base shade.
Don’t forget about texture: the fur around the eyes and mouth is often longer and thicker than on the rest of the face, creating a soft, rounded appearance. Use short, curved strokes to suggest this texture, gradually building up layers for added depth and dimension. By paying attention to these details, you can create a wolf’s eyes that seem to gleam with life.
Practice Exercises and Projects
Now that you’ve mastered the basics, it’s time to put your skills into practice with some fun exercises and projects that will help you improve your wolf drawing techniques.
Simple Wolf Drawings for Beginners
Start by practicing simple wolf drawings that focus on basic shapes and lines. One exercise is to draw a wolf’s silhouette using just three curved lines: one for the back, one for the belly, and one for the head. This will help you get comfortable with drawing the overall shape of a wolf without worrying about details.
Another exercise is to draw a wolf standing on all fours, focusing on straight lines for the legs and a gentle curve for the back. Pay attention to the proportions: a wolf’s front legs should be slightly shorter than their hind legs.
For an even simpler exercise, try drawing just one wolf feature – the nose or paw pads – in isolation. This will help you develop your fine motor skills and get a sense of how to draw individual textures and features. Use reference images as needed, but also practice from memory to build your confidence.
To make these exercises more engaging, try varying the angle or pose of the wolf each time you draw it. For example, instead of drawing a straight-on profile, try drawing the wolf’s side view or from behind. This will help you develop your observational skills and get comfortable with drawing wolves in different contexts.
Advanced Wolf Drawing Projects
To take your wolf drawing skills to the next level, try tackling more complex projects and exercises. One idea is to create a wolf in a dynamic pose, such as running or jumping, which requires a good understanding of anatomy and movement. You can also experiment with different textures and patterns on the fur, like blending smooth coats with rougher ones.
Another challenge is to draw a wolf in a specific environment, like a forest or a mountainous terrain. This will help you practice incorporating background details into your artwork while still focusing on the main subject. Consider using reference images of real wolves in various settings to get an idea of how they interact with their surroundings.
If you’re feeling ambitious, try drawing a wolf in different lighting conditions, such as at dawn or dusk when the light is soft and warm. This will test your ability to capture subtle shading and value changes. Remember to pay attention to the overall mood and atmosphere you want to convey through your artwork. For example, a wolf in a misty forest might evoke a sense of mystery and calm, while one in bright sunlight could feel more energetic and playful.
Common Mistakes and Troubleshooting
As you continue to practice your wolf drawing skills, it’s inevitable that you’ll encounter some common mistakes that can throw off your entire piece. This section will help you troubleshoot and overcome these errors.
Identifying and Correcting Common Errors
When drawing wolves, beginners often struggle with proportions and anatomy. One common error is misplacing or exaggerating features such as the wolf’s ears, eyes, or muzzle. To correct this, study reference images of wolves from different angles to develop a mental image of their proportions.
Pay attention to the ratio between the wolf’s body length and its height – a wolf’s torso should be roughly two to three times its height. If you’re unsure about specific features, try measuring them using a grid or a proportion guide in your drawing software.
Another common mistake is inaccurate fur texture and patterns. To achieve realistic fur, practice blending short strokes of varying thicknesses and textures. Use reference images to observe the way light catches the wolf’s fur and creates subtle gradients.
Common errors can also arise from incorrect shading and value techniques. To avoid this, experiment with different shading methods – such as hatching, cross-hatching, or stippling – to achieve depth and dimension in your drawings.
Overcoming Frustration and Building Confidence
When drawing wolves, it’s normal to feel frustrated when your attempts don’t quite turn out as expected. This can lead to self-doubt and a lack of confidence in your artistic abilities. To overcome frustration and build confidence, try breaking down the drawing process into smaller, manageable tasks. Focus on one aspect at a time, such as getting the proportions right or capturing the wolf’s facial expression.
Setting achievable goals for each practice session can help you stay motivated and track your progress. For example, aim to complete a simple wolf sketch within a certain timeframe or master a specific technique over several sessions. Celebrate your small victories along the way, even if it’s just perfecting the shape of the ears or getting the fur texture right.
Developing a growth mindset is also essential for overcoming frustration and building confidence in drawing wolves. Remember that mistakes are an inevitable part of the learning process, and they can often lead to new insights and discoveries. Instead of dwelling on errors, use them as opportunities to learn and improve.
Frequently Asked Questions
Can I use digital drawing tools to create wolf drawings?
Yes, you can use digital drawing tools like Procreate or Adobe Photoshop to create wolf drawings. However, it’s essential to understand the basics of traditional drawing first, as this will help you apply your skills and techniques more effectively in a digital environment.
How do I know if my wolf drawing is realistic enough?
To determine whether your wolf drawing is realistic, pay attention to its proportions, anatomy, and overall structure. Compare your drawing with reference images to ensure that the shapes, lines, and textures are accurate. Don’t be afraid to make adjustments or try new techniques until you achieve a more realistic look.
What if I’m struggling to draw the eyes of my wolf?
Drawing realistic wolf eyes can be challenging, but it’s achievable with practice. Focus on capturing the correct shape, proportions, and expression. Pay attention to the iris, pupil, and eyelids, as these details will help bring your wolf’s eyes to life.
Can I use reference images for advanced techniques like shading and texture?
Yes, you can still use reference images even when working with more advanced techniques like shading and texture. However, be sure to observe how different artists achieve specific effects and apply those learnings to your own work. Experimentation and practice will ultimately help you develop a style that suits your artistic vision.
How do I know when my wolf drawing is finished?
Knowing when your drawing is complete can be subjective, but here are some general guidelines: pay attention to the overall composition, balance, and harmony of your artwork. If you’ve captured the essence of your subject and have achieved a level of detail that meets your goals, it’s likely time to consider your drawing finished.