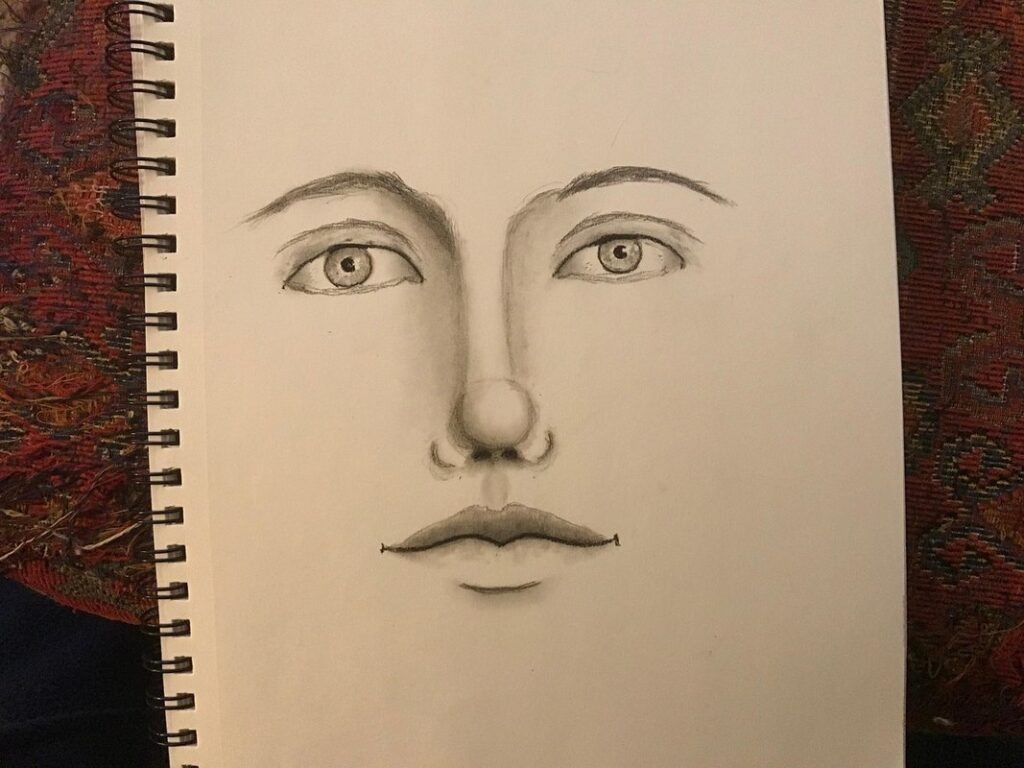
Drawing a realistic nose can be one of the most challenging aspects of portrait drawing, yet it’s also an essential part of capturing a person’s likeness. The nose is the central feature of the face, and its shape, proportions, and subtle expressions convey a wealth of emotional information. Mastering the art of sketching a nose requires a deep understanding of facial anatomy, as well as techniques for rendering nuanced textures and subtle variations in form. In this comprehensive guide, we’ll explore the intricacies of drawing a realistic nose, from basic anatomy to advanced methods for capturing complex expressions and textures. By the time you finish reading, you’ll have the skills and confidence to draw noses that are both accurate and expressive, adding depth and character to your portraits.
Understanding the Basics of Nose Anatomy
To effectively capture the nuances of nose anatomy on paper, it’s essential to understand its basic structure and components. The nasal framework is comprised of bone, cartilage, and soft tissue.
Defining the Proportions of a Realistic Nose
When sketching a realistic nose, it’s essential to understand its proportions. The average length of an adult nose is around 4-5 cm (1.6-2 inches), with most noses being slightly longer than they are wide. However, this can vary significantly from person to person.
To help you achieve accuracy, consider measuring the distance between your eyes and the tip of your nose. This will give you a rough idea of the overall length and proportion of your own nose. When sketching, use this measurement as a reference point to create a more realistic representation.
The bridge of the nose is typically around 1-2 cm (0.4-0.8 inches) wide, with some noses being slightly wider or narrower than average. The nostrils are usually positioned about one-third of the way down from the tip, and their size can vary significantly depending on individual facial features.
When capturing the proportions of a nose in your artwork, focus on creating a balanced relationship between its length, width, and curvature. Experiment with different measurements to achieve a more realistic representation, taking into account the unique characteristics of your subject’s nose.
Recognizing Key Facial Features
When sketching a nose, it’s essential to identify its distinct features, which include the bridge, tip, and nostrils. The bridge is the curved portion that connects the nose to the face, while the tip is the rounded end of the nose. The nostrils are the openings at the base of the nose, just above the upper lip.
To recognize these key facial features, observe how they relate to other parts of the face. For instance, the bridge of the nose should be proportional to the distance between the eyes and the mouth. A well-proportioned bridge will also harmonize with the angle of the eyebrows. The tip of the nose should balance the overall shape of the face, while the nostrils should be in line with the mouth.
A good starting point is to study photographs of noses from different angles. Notice how the bridge and tip change in proportion when viewed from profile versus frontal views. Also, observe how the nostrils are positioned relative to the upper lip. By paying attention to these details, you’ll develop a keen eye for capturing the subtleties of nose anatomy on paper.
Mastering Various Drawing Techniques for the Nose
To create a nose that looks realistic, you need to master various drawing techniques that capture its unique proportions and contours. We’ll explore different methods for sketching noses, from basic shapes to subtle nuances.
Softening and Shaping with Gentle Curves
When drawing a nose, it’s essential to capture its gentle curves and smooth contours. To achieve this, focus on softening and shaping lines with gentle curves. Start by observing the subtle S-curve that runs along the bridge of the nose, connecting the nostrils. This curve sets the foundation for the rest of the nose’s shape.
To replicate this S-curve, use a flexible line tool or a graphite pencil to create smooth, flowing strokes. Begin at one end and gently curve the line, allowing it to meet the other side without hard angles. Practice creating this curve in isolation before applying it to your drawing. The key is to avoid sharp corners and instead opt for soft, rounded transitions.
Pay attention to the nostrils as well, which should be slightly flared outward, following the natural curvature of the nose. To capture this, use a gentle “U” shape or a smooth, curved line that meets at the tip of each nostril. This will help create a more realistic and nuanced representation of the nose’s contours.
Adding Texture and Dimension with Hatching and Cross-Hatching
To add texture and dimension to your nose drawings, explore hatching and cross-hatching patterns. Hatching involves creating parallel lines that follow the contours of the nose, while cross-hatching uses layered hatching at different angles to create depth. Start with gentle hatching on the bridge and tip of the nose, gradually increasing pressure for deeper, darker areas like the nostrils.
Use a range of line weights and densities to suggest the softness or firmness of the nose’s skin. For example, delicate hatching can convey a smooth, youthful appearance, while coarser lines may indicate age or skin conditions. Experiment with different hatching directions – diagonal, horizontal, or curved – to capture the unique topography of each nose.
When cross-hatching, apply layers of hatching at 90-degree angles to create rich textures and subtle shading. Pay attention to the intersection points where these layers meet, as they can add a sense of volume and dimensionality. Consider using a range of pencil grades or even digital drawing tools to achieve varying line weights and effects.
Portraying Different Types of Noses in Art
When sketching a nose, one must consider various shapes and sizes to accurately capture its unique character. From aquilines to bulbous, each type presents its own artistic challenge.
Depicting Various Ethnicities and Facial Shapes
When depicting various ethnicities and facial shapes, it’s essential to understand that noses come in an array of forms. For example, many people from East Asian cultures have a more delicate nose with a smaller bridge and tip. In contrast, those from Middle Eastern or South Asian backgrounds may have a slightly larger, more defined nose.
One way to achieve accurate representation is by studying reference images from diverse sources. Look for photographs or drawings that showcase the unique characteristics of different ethnicities and facial types. You can also experiment with different proportions and shapes in your own sketches to get a sense of what works best for each subject.
Be aware that noses come in various sizes and contours, too. Some people have a slightly upturned or down-turned nose, while others may have a more rounded or pointed tip. When drawing these variations, pay attention to the overall balance and harmony of the face, rather than just focusing on the nose itself. For instance, a larger nose might be offset by a smaller mouth or more pronounced facial features.
Illustrating Nose Variations Due to Age or Health Conditions
When drawing noses that have been affected by age, health conditions, or other factors, you must pay attention to specific details that deviate from the norm. For instance, a nose with a prominent hump may require softer, more subtle curves to convey a sense of wear and tear. Conversely, a nose with a pronounced saddle nose deformation – often caused by a broken nose or extensive nasal surgery – calls for sturdier lines and more defined contours.
To accurately capture these nuances, observe the way light interacts with the affected areas. For example, a nose with rosacea may exhibit redness that’s more pronounced in certain lighting conditions. You can use hatching techniques to suggest this increased blood flow without overemphasizing it. Similarly, a nose with significant scarring might benefit from the use of gentle cross-hatching to create a sense of texture and depth.
When drawing noses affected by age or health conditions, remember that imperfections are an inherent part of their character. Avoid trying to “fix” these issues; instead, learn to see them as opportunities to add depth and realism to your drawings. By doing so, you’ll create more nuanced and empathetic portraits that celebrate the unique stories behind each individual’s nose.
Tips for Drawing a Realistic Nose from Different Angles
When drawing a realistic nose, mastering different angles is crucial to capturing its three-dimensional shape and subtle contours. Let’s explore tips for accurately rendering noses from various vantage points.
Capturing the Nose in Profile
When drawing the nose from profile views, it’s essential to consider both perspective and proportions. The nose appears longer and more angular when viewed from the side, so be sure to elongate its shape accordingly. Pay attention to the nostrils, which should appear slightly smaller and more rounded in profile.
To achieve a realistic profile view, study the way light falls on the nose. Notice how shadows cast by the bridge of the nose create a subtle curvature that adds depth to the overall shape. When rendering this angle, try to capture these subtleties with gentle hatching or cross-hatching techniques.
Keep in mind that the nose’s proportions change significantly when viewed from profile. The tip should appear slightly more pointed, while the nostrils should be positioned closer together. Practice observing and drawing noses from different angles to develop a keen sense of their spatial relationships and subtle variations.
When working from reference images or life drawings, pay attention to the subtle tilt of the nose in relation to the surrounding facial features. This slight incline can greatly impact the overall balance and realism of your sketch.
Rendering the Nose from Frontal and Three-Quarter Views
When drawing the nose from frontal and three-quarter views, it’s essential to capture its shape and proportion accurately. Start by analyzing the nose’s overall form: a gentle slope from the bridge to the tip, with a slight curvature on either side. From the frontal view, pay attention to the nasal bones’ projection and the subtle indentations on either side of the nostrils.
In a three-quarter view, notice how the nose begins to tilt slightly towards the face, creating a more dynamic angle. To render this accurately, draw the nose’s profile from the side, taking care to capture its gentle curves and contours. Use soft lines and gentle hatching to suggest the texture of the skin and the subtle definition between the bridge and tip.
When drawing from both views simultaneously, focus on finding the average line that unites the two profiles. This will help you achieve a more balanced representation of the nose’s shape and proportion. Practice combining these techniques by sketching different noses in various frontal and three-quarter poses – observe how the angle of the face affects the overall appearance of the nose.
Advanced Techniques for Adding Realism to Your Nose Drawings
As you refine your nose-drawing skills, let’s take it up a notch with expert techniques that add depth and dimensionality to your sketches. Mastering these subtle nuances will elevate your artwork significantly.
Employing Atmospheric Perspective to Create Depth
Atmospheric perspective is a powerful tool for creating depth and distance in nose drawings. By subtly suggesting the fading of details as they recede into the background, you can create a convincing sense of three-dimensionality. Start by softening the edges and lines of distant features, such as the nostrils or tip of the nose, to suggest that they are farther away.
To achieve this effect, use gentle strokes and soft pencils, gradually decreasing in darkness and intensity as you move back into the background. For example, if drawing a nose from frontal view, consider softening the definition of the nostrils and the bridge of the nose where it meets the forehead. This will help create a sense of depth by implying that these features are receding into the distance.
When employing atmospheric perspective, it’s essential to balance subtlety with consistency. Avoid over-softening or erasing details, as this can lead to an unnatural, hazy appearance. Instead, aim for a subtle fade-out, where the softening of edges and lines is gradual and convincing. This will help create a rich, layered sense of depth in your nose drawings.
Applying Color and Shading to Enhance Realism
When it comes to capturing realism in your nose drawings, color and shading play crucial roles. One of the most important techniques is accurately representing subtle nuances in skin tones. To achieve this, artists often employ a range of colors, from warm yellows and oranges to cool pinks and purples. Experiment with blending these hues to create a natural-looking gradient that simulates the way light interacts with the nose’s surface.
Shading is also vital for adding depth and dimension to your drawings. Use gentle, smooth transitions between light and dark areas to suggest the contours of the nose. Pay particular attention to the nasolabial folds, where the skin tends to be thinner and more prone to shadows. To capture these subtleties, try using a range of shading techniques, including hatching, cross-hatching, and stippling.
For added realism, consider capturing the subtle texture of the nose’s surface. This can be achieved by applying gentle, layered strokes with a variety of tools or digital brushes. By combining accurate color representation with nuanced shading and textured detail, you can create a nose drawing that feels remarkably lifelike.
Frequently Asked Questions
How Long Will It Take to Master Sketching a Realistic Nose?
Mastering the art of sketching a realistic nose takes time and practice. Focus on building your skills gradually, starting with basic proportions and techniques. As you progress, you’ll develop your observation and drawing abilities, allowing you to capture more nuanced expressions and textures. With consistent effort, it may take several weeks or months to achieve proficiency.
What If I’m Drawing a Nose from an Unusual Angle?
When drawing the nose from an unusual angle, consider the perspective and proportions of the face as a whole. The nose should still be recognizable and proportional to other facial features. To capture a unique viewpoint, break down the shape of the nose into simpler forms, and focus on the relationships between different components.
Can I Use Digital Tools for Sketching a Realistic Nose?
Yes, you can use digital tools to sketch a realistic nose. Many drawing software programs offer tutorials and guides specifically designed for portrait and figure drawing, including the nose. Digital tools allow for flexibility in experimenting with various techniques and styles without wasting paper or materials.
How Do I Ensure My Nose Sketches Are Proportional?
Proportion is crucial when drawing the nose. To ensure accuracy, study reference images of different noses from various angles and perspectives. Practice measuring and comparing the proportions of your own drawings to those in reference images, adjusting as needed to achieve a realistic representation.
What If My Subject Has a Unique Nose Shape Due to a Health Condition or Facial Birthmark?
When drawing a nose with unique features due to a health condition or facial birthmark, approach the subject with sensitivity and respect. Study reference images of individuals with similar conditions, taking note of subtle differences in shape, proportion, and texture. Be mindful of accurate representation while still conveying the individual’s character and personality through your artwork.