Drawing a realistic nose can make or break a portrait. You’ve probably noticed how off-putting it is when an otherwise great sketch has a wonky, non-proportional nose. It’s amazing how much character and expression a well-rendered nose can add to a face. In fact, the anatomy of the nose is surprisingly complex, with subtle curves and planes that require attention to detail. When drawing noses, line work and shading are crucial, but so is understanding the underlying structure and proportions. This guide will walk you through expert techniques for capturing realistic noses in your art, covering everything from basic anatomy to advanced rendering methods. By the end of this article, you’ll have the skills and confidence to tackle even the most challenging portrait subjects.
Understanding the Basics of Nose Anatomy
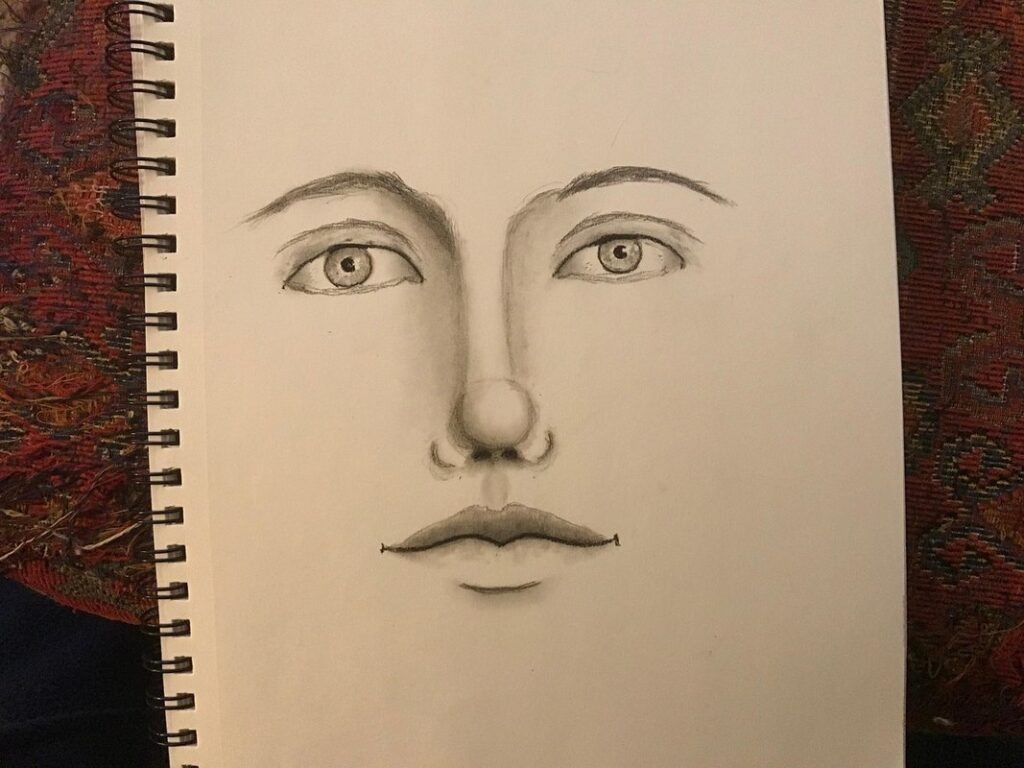
The nose is often the most challenging feature to draw accurately, but understanding its basic anatomy can make a huge difference. Let’s take a closer look at the key components that make up the nose structure.
Recognizing Nose Types
When drawing a nose, it’s essential to understand the various types of noses to capture their unique characteristics. One common distinction is between Greek and Roman noses. A Greek nose is typically shorter and more refined, often with a subtle curvature at the tip. In contrast, a Roman nose is longer and more prominent, frequently featuring a more defined bridge.
Identifying these differences can help you achieve a more realistic representation of your subject’s nose. For instance, if you’re drawing a classical portrait, a Greek nose might be more suitable to evoke a sense of elegance and sophistication. Conversely, a Roman nose could add gravitas and character to a figure study.
Beyond the Greek and Roman profiles, there are other common nose types, such as the upturned, button, or aquiline noses. Recognizing these variations allows you to tailor your drawing technique accordingly. For example, an upturned nose might require more gentle curves to convey its subtle upward tilt. By considering the unique features of each nose type, you’ll be better equipped to capture their essence on paper and create more nuanced, lifelike portraits.
Identifying Facial Proportions
When drawing a nose, facial proportions play a crucial role in achieving realism. The size and placement of the nose are determined by the overall face shape and dimensions. To measure these proportions accurately, start by identifying the facial landmarks such as the eyes, eyebrows, and mouth. Divide the face into thirds both horizontally and vertically.
The ideal nose-to-face ratio is typically around 1:5 or 1:6, where one unit of measurement (such as the width of an eye) represents a fifth or sixth of the total nose length. However, this can vary depending on individual facial structures. For example, in a wider face, the nose may appear shorter and more turned-up, while in a narrower face, it appears longer and more straight.
To determine your subject’s ideal nose-to-face ratio, use a proportional grid or measure their face to create a custom template. This will help you accurately draw the nose size and shape, taking into account their unique facial features. By focusing on these proportions, you’ll be able to create a more realistic and balanced nose in your drawings.
Fundamentals of Line Work and Shading
Understanding line weight, texture, and value is crucial when drawing noses accurately. We’ll break down these essential fundamentals to help you master nose drawing techniques.
Basic Line Techniques for the Nose
When drawing a nose, establishing a strong foundation with basic lines and shapes is crucial. Begin by sketching the overall form of the nose using simple geometric shapes such as circles, ovals, or rectangles to help you place the features accurately.
To create the illusion of depth and dimension, use hatching techniques. Hatching involves applying parallel strokes that follow the contours of the nose. Vary the direction and pressure of your strokes to suggest different textures and surfaces, such as the smooth bridge or the slightly indented tip.
For added detail and shading, experiment with cross-hatching. This technique involves layering perpendicular lines over the hatched surface. Start with gentle strokes and gradually increase the darkness by adding more layers, carefully observing how each layer interacts with the one below.
Pay close attention to the subtle gradations of tone that will give your nose its three-dimensional appearance. By mastering these basic techniques, you’ll be able to capture a wide range of facial types and expressions, from delicate and refined to strong and imposing.
Shading for Realism and Dimension
When creating a nose drawing, shading plays a crucial role in adding depth and dimension. One technique to achieve this is chiaroscuro, which involves using strong contrasts between light and dark to create a three-dimensional effect. By applying deeper shadows to certain areas of the nose, such as the creases around the nostrils or the tip, you can create the illusion of volume.
Atmospheric perspective also comes into play when shading noses. As objects recede into the distance, they tend to lose detail and become less distinct. This is due in part to the way light scatters through the atmosphere. To achieve a similar effect in your drawings, use softer, more muted shading for the nose’s distant features.
To apply this concept practically, consider using a range of shades from dark brown to pale gray. For a nose with a strong profile, apply deeper shadows to the areas where the nose meets the surrounding facial structure. Conversely, use lighter shades on areas that appear farther away or less prominent. Experimenting with different shading techniques and approaches will help you develop a nuanced understanding of how light interacts with the nose’s contours.
Portraying the Nose in Various Faces
The nose is a versatile feature that comes in different shapes and sizes, requiring varying drawing techniques to accurately capture its essence. Let’s explore how to render noses of all ages and ethnicities with precision and charm.
Drawing Different Ethnicities
When drawing noses for individuals from different ethnicities, it’s essential to observe and render distinct features. For instance, African noses tend to be slightly broader at the base and more rounded, with a less prominent bridge between the nostrils. Asian noses often have a higher, more upturned tip and a smaller bridge.
In contrast, European noses are typically longer and narrower, with a more defined bridge. To accurately draw an individual’s nose from a different ethnicity, study reference images of people from that group. Note the shape and proportions of their nose in various views, such as profile or full-face drawings. For example, you might see that a person of African descent has a slightly flatter nasal tip.
When drawing noses for characters or figures with diverse ethnicities, remember that individual variations exist within each group. Avoid relying on stereotypes and instead focus on observing the unique features of your subject. By doing so, you’ll create more nuanced and accurate portraits.
Expressive Nostrils and Lips
When drawing portraits, capturing the subtleties of a person’s facial expression is crucial. The nose-lip combination plays a significant role in conveying emotions and character. A well-rendered nose can make or break the believability of a portrait.
Start by observing the way the nostrils flare when someone is angry or excited. A slight flare at the edges, rather than a uniform shape, can add depth to your drawing. Conversely, relaxed nostrils should be slightly retracted, which you can achieve by subtly shortening their length.
The lips also contribute significantly to the overall expression of the face. Thin, pursed lips can convey skepticism or disapproval, while full, rounded lips may suggest a more generous or even playful personality. Note how the shape and curvature of the upper lip affects the overall appearance of the nose-lip combination. The relationship between these two features should be studied in real-life subjects to gain a better understanding of their interaction.
When drawing, focus on capturing the nuanced interactions between the nostrils and lips rather than rendering each feature separately. This approach will result in more dynamic and realistic portraits that convey the complexities of human emotion.
Advanced Techniques: Caricature and Humor
Now that you’ve mastered basic nose drawing techniques, it’s time to take your skills to the next level by learning how to create humorous caricatures of noses. We’ll explore some advanced methods for adding personality and whimsy to your art.
Cartoony Nose Features
When exaggerating nose features for comedic effect or caricature purposes, it’s essential to focus on a few key areas. Cartoony noses often have a more pronounced, curved shape than realistic ones, so try using gentle arcs and smooth transitions to create a sense of flow. The nostrils can be manipulated by making them larger, longer, or more angular – just be mindful not to overdo it, as this can quickly become comical in an unpleasant way.
Another feature to consider is the nose’s overall size and proportion. Cartoons often have exaggerated facial features, so feel free to blow up your subject’s nose a bit for comedic effect. However, keep an eye on the rest of their face – you don’t want to overcompensate and create an unbalanced look.
In terms of specific techniques, trying out different shapes and sizes can be helpful in getting a sense of what works best for your particular style. Some artists also find it useful to practice drawing noses with extreme proportions – for example, a nose that’s disproportionately large compared to the rest of the face. By experimenting with these approaches, you’ll get a better feel for how to manipulate nose features for comedic effect.
Subtle Distortions for Emphasis
When subtly distorting the nose to emphasize a facial expression or emotion, it’s essential to consider the entire face as a whole. The nose is often the central feature around which other facial expressions revolve. To effectively use distortions for emphasis, focus on exaggerating the underlying emotional drivers rather than merely stretching or compressing the nose itself.
For instance, in a comedic drawing of a person with a mischievous grin, the nose might be slightly upturned to convey the character’s slyness. Conversely, a downcast expression might feature a nose that’s subtly pinched at the tip, implying sadness or disappointment. In these cases, the distortion is not about the absolute shape of the nose but rather how it relates to the surrounding features and the overall emotional context.
Pay attention to the subtlety of your distortions; too much exaggeration can quickly become cartoonish or comical in an unintended way. Instead, strive for a nuanced balance that enhances the subject’s expression without becoming distracting. Practice drawing various faces with slight nose distortions to develop your skills and better understand how this technique can elevate your artwork.
Common Mistakes and Troubleshooting
Don’t worry if your nose drawings aren’t quite right yet, we’ve all been there. This next part of our guide tackles common mistakes and provides tips to help you troubleshoot any issues that arise.
Correcting Proportion Issues
Proportion is key to drawing a realistic nose. One common issue is when the nostrils are too small compared to the rest of the nose. To correct this, try measuring the distance between the bottom of the bridge and the top of the nostril rim. A general rule of thumb is that the nostrils should take up about one-quarter to one-third of the total height of the nose. If your drawings consistently have undersized nostrils, check your reference images for accurate proportions.
Another issue is when the nose itself is too long or too short compared to the face. Measure from the tip of the chin to the bridge of the nose, and then use this length as a guide to draw the nose in proportion. For example, if the chin-to-bridge measurement is about 10 units, try to make the nose roughly one-quarter to one-fifth of that length. Pay attention to the overall facial shape and proportions when drawing the nose, rather than relying on guesswork or habit.
Overcoming Lack of Confidence
Drawing noses can be a daunting task, especially when you’re struggling with confidence. It’s common to feel uncertain about capturing the subtleties of nasal anatomy and proportion. But with consistent practice and patience, you can overcome these doubts.
One effective way to build confidence is by breaking down the nose into its basic components: shape, size, and placement on the face. Start by practicing simple exercises like drawing noses from different angles or using a grid system to help achieve accurate proportions. You can also try sketching noses in various styles, such as realistic or caricatured, to loosen up your approach.
Another helpful exercise is to study and draw multiple references of noses. This will help you develop an understanding of the nose’s varied shapes, sizes, and orientations within different facial structures. By studying real-life examples, you’ll become more comfortable with the nuances of nasal anatomy and better equipped to tackle challenging drawings. As your skills improve, so too should your confidence in rendering noses that accurately capture the subtleties of human expression.
Frequently Asked Questions
How Can I Practice Drawing Different Nose Types Without Getting Confused?
When practicing drawing various nose types, start by breaking down the characteristics of each type. For example, study the shape and proportions of the Greek nose, then focus on one or two features at a time, such as the bridge or tip. Use reference images to help you visualize these differences.
Can I Use Digital Tools for Drawing Nostrils and Lips Expressively?
Yes, you can use digital tools like brushes and layer blending modes to capture expressive nostrils and lips. Experiment with different brush settings, textures, and opacity levels to achieve dynamic results that add life to your portraits.
What If My Subject Has a Rare or Unusual Nose Shape – Should I Still Try to Draw It Realistically?
Yes, you should still try to draw it realistically. While accuracy is key in portraiture, unique nose shapes can also be opportunities for creativity and artistic expression. Research the subject’s ethnicity and cultural background to gain insight into their facial features and proportions.
How Can I Balance Realism with Humor or Exaggeration in Caricature Portraits?
To balance realism with humor or exaggeration, start by identifying the essential features of your subject’s nose and then deliberately manipulate them for comedic effect. Consider using techniques like stretching or squashing proportions to create a more cartoonish look while still maintaining some semblance of likeness.
Can I Use Advanced Techniques Like Chiaroscuro and Atmospheric Perspective in Digital Drawing Programs?
Yes, you can use digital drawing programs to apply advanced techniques like chiaroscuro and atmospheric perspective. Experiment with layering, blending modes, and subtle gradient adjustments to achieve a convincing sense of depth and dimensionality in your digital drawings.