Drawing realistic skulls can be a challenging but rewarding task for artists. Many people may assume that rendering a skull is just a matter of adding some bony details, but the truth is that creating an accurate and visually appealing skull requires a deep understanding of basic shapes and forms. When drawing a skull, it’s essential to start with the simple structure of the cranium and facial bones before moving on to more intricate features such as teeth and eye sockets. Whether you’re a beginner or an experienced artist looking to improve your skills, mastering the techniques for drawing realistic skulls can open up new creative possibilities for portraits, still-life compositions, and even fantasy art. In this article, we’ll cover essential techniques from basic shapes to advanced rendering methods, providing expert tips for artists of all levels to help you create stunning skull drawings.
Understanding the Basics
Let’s start with the fundamentals of skull drawing, where we’ll break down the essential shapes and proportions that form the foundation of a realistic skull. This foundation will set you up for success in more advanced techniques later on.
What is a Skull in Art?
Skulls have been a recurring motif in art throughout history, symbolizing mortality, spirituality, and the human condition. In ancient cultures such as Egypt and Mexico, skulls were revered for their connection to the afterlife and the cycle of life and death. The Aztecs, for example, would often decorate skulls with feathers and flowers, while the Egyptians depicted them in elaborate funerary contexts.
This cultural significance extends beyond mere symbolism; skulls have also been used as a means of artistic expression, particularly in the realm of surrealism. Artists like Leonora Carrington and Max Ernst incorporated skulls into their work, exploring themes of identity, decay, and the blurring of lines between life and death.
Today, skulls remain a popular subject in art, often used to convey themes of mortality, rebellion, or the transience of human existence. As an artist, recognizing the cultural significance of skulls can help you tap into this rich history and create work that resonates with viewers on a deeper level. By understanding the various contexts and meanings associated with skulls, you can use them as a powerful tool in your own artistic expression.
Identifying Key Features
When drawing a skull, it’s crucial to get the facial structure right. This includes accurately depicting the eyes, nose, and mouth. The eyes should be relatively close together, with the upper eyelid typically being slightly lower than the lower one. The nose is positioned just below the forehead, while the mouth curves gently down towards the chin.
The skull itself has a distinctive shape, with a curved forehead, prominent cheekbones, and a pointed chin. Understanding its proportions is also vital – for example, the width of the forehead should be roughly 1.5 to 2 times that of the eye socket. If you’re drawing from life or reference images, pay attention to how these features interact with each other.
The skull’s overall shape is often described as an oval, with the top being slightly narrower than the bottom. This can help guide your placement and proportioning of facial features.
Sketching the Skull
When drawing a skull, it’s essential to focus on capturing the intricate details and proportions that make up its unique shape. Let’s start by examining the overall structure of the skull.
Basic Shapes and Forms
Start by sketching a simple circle to represent the overall shape of the skull. This will serve as the foundation for more detailed drawing. Next, break down the skull into its basic components: ovals for the eye sockets and orbits, and a slightly curved rectangle or oval for the jawline.
Proportion is key when drawing the skull from these shapes. Measure the distance between the edges of your initial circle to ensure it’s roughly equivalent to the width of three or four ovals stacked together. This will help you achieve a more accurate representation of the skull’s proportions.
When working with basic shapes, pay attention to their relationship to one another. The eye sockets should be relatively equal in size and positioned approximately one-third from the top edge of your initial circle. The jawline, on the other hand, should be positioned roughly at the midpoint between the bottom edge of the circle and the base of the skull.
Remember that these shapes will form the basis for more detailed drawing, so focus on capturing their proportions and relationships accurately to set yourself up for success in the next stages of your skull drawing.
Refining the Features
The eyes are a crucial aspect of capturing the skull’s essence. To achieve a realistic representation, pay attention to the shape and size of the eyeballs within their sockets. A typical adult skull has slightly protruding eyeballs, so ensure this subtle detail is reflected in your drawing. The irises should be depicted as rounded, with the pupils positioned near the center.
The nose and mouth areas require a delicate balance between definition and subtlety. Avoid overemphasizing these features, as they can quickly dominate the skull’s overall appearance. Instead, focus on creating gentle curves and smooth transitions between the nasal bone, nostrils, and lips. When shading these regions, consider using soft, sweeping strokes to suggest depth without losing the area’s inherent softness.
The jawline is another key feature that demands attention to proportion and detail. The mandible’s curve should be softly rounded at the edges, with a slight tapering towards the chin. To capture this effect, use gentle hatching or blending techniques to guide the viewer’s eye along the jaw’s contours. By paying close attention to these finer details, you’ll be able to imbue your skull drawing with a rich sense of depth and dimensionality.
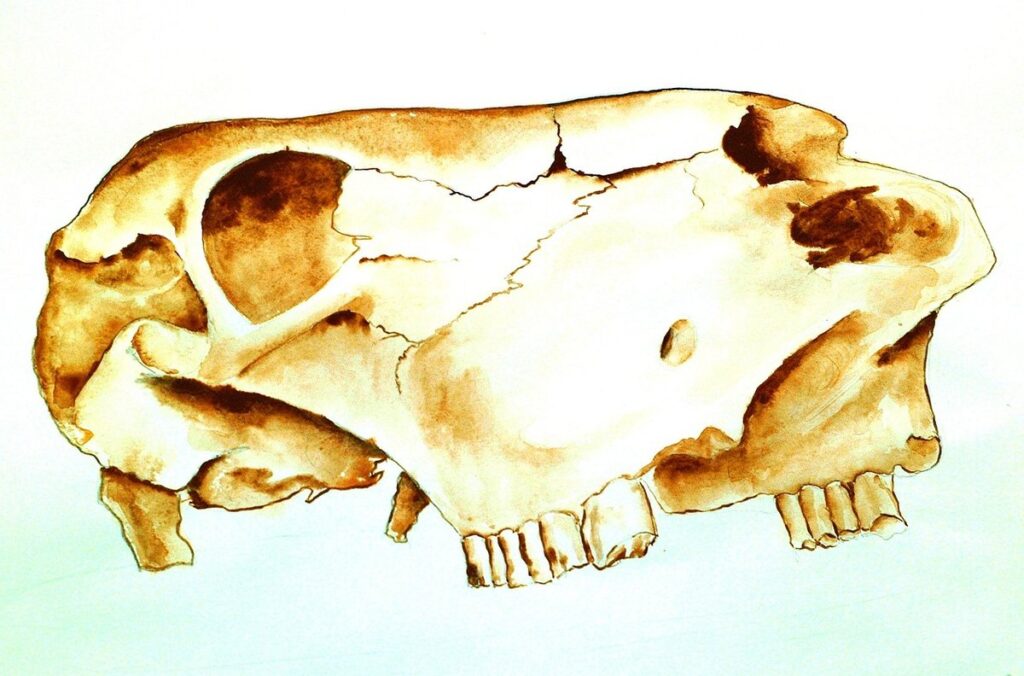
Anatomy and Musculature
The skull is comprised of 22 bones, each with its own distinct shape and function. Understanding their unique anatomy is crucial to drawing a realistic and accurate skull.
Understanding Skull Structure
The skull is composed of 22 bones, which are divided into two main categories: cranial bones and facial bones. Cranial bones make up the cranium, protecting the brain, while facial bones form the structure of the face, supporting muscles that enable expressions and movements. Understanding these differences is crucial for capturing realistic facial features in your artwork.
The sphenoid bone, a part of the cranial complex, plays a vital role in forming the base of the skull. Its unique shape affects the position of surrounding structures like the nasal cavity and eyesocket. In contrast, the zygomatic bones, or cheekbones, are part of the facial structure and contribute to the overall width and depth of the face.
When drawing skulls, artists often focus on capturing the proportions and shapes of individual features rather than their interplay with one another. However, observing how different bone structures intersect can help create more nuanced, lifelike expressions. For example, the position of the nasal bones in relation to the sphenoid bone can significantly alter the appearance of a subject’s nose.
Capturing Facial Expression
When rendering a skull’s facial expression, it’s essential to capture not just the overall emotion but also the subtleties that reveal character. This involves paying attention to the nuances of the eyes, eyebrows, and mouth.
Notice how the shape and placement of the eyebrows can suggest either a relaxed or intense mood. Even slight deviations from the midline – a raised inner brow, for instance – can convey specific emotions like anxiety or suspicion. The eyes themselves are equally expressive: observe how the direction and tilt of the gaze can indicate attention, interest, or even boredom.
To accurately depict these subtleties, artists should focus on capturing the underlying musculature that governs facial expression. This means understanding how muscles like zygomaticus major and orbicularis oculi work together to create a wide range of emotions from subtle smiles to intense frowns. By observing and studying these relationships, artists can more effectively convey the character’s personality and emotional state on paper.
Techniques for Realism
To capture the intricate details of a skull, you’ll want to focus on mastering a range of advanced techniques, such as layering shading and texture. This is where realism comes alive in your artwork.
Shading and Texture
When it comes to creating realistic skull drawings, shading and texture play a crucial role in adding depth and dimension. Hatching involves drawing closely spaced parallel lines that follow the contours of the skull’s surface, while cross-hatching creates a more layered look by layering hatching lines at different angles. Stippling, which involves using small dots to create an image, can also be used to simulate texture and detail.
To achieve realistic shading, pay attention to the way light interacts with the skull’s surface. Notice how shadows fall in areas where bone is recessed or where cartilage forms protrusions like the nasal crest. Use your knowledge of anatomy to identify these features and apply them to your drawing. For example, the bony ridges on either side of the skull’s forehead create a prominent shadow that can be deepened with cross-hatching.
When simulating texture, focus on areas where cartilage meets bone or where muscles attach to the skull’s surface. Use short, expressive lines to suggest the way skin folds and creases as it adheres to underlying bone. Remember, texture should enhance the overall realism of your drawing rather than overwhelming it – use restraint when applying texture and shading techniques to achieve a balanced look.
Advanced Rendering Methods
Atmospheric perspective adds depth to a skull drawing by subtly suggesting distance. This technique involves lightening colors and softening edges as they recede into the background. In practice, use gentle gradients to fade outlines and details towards the back of the composition. You can also apply this effect to specific elements like eye sockets or teeth to create visual hierarchy.
Chiaroscuro is another advanced rendering method that plays with contrast to create drama. By emphasizing strong light sources, you can highlight key features while relegating others to darkness. In a skull drawing, this might mean illuminating the orbits to make the eyes seem more prominent or using harsh shadows to accentuate bony protrusions.
To apply chiaroscuro effectively, identify areas where high contrast can create visual interest. Balance strong highlights with softer shadows to avoid an overly stark look. Keep in mind that chiaroscuro works best when used judiciously – too much contrast can overwhelm the composition.
Practice and Improvement
Now that you have a solid understanding of skull anatomy, let’s focus on honing your drawing skills through consistent practice and deliberate improvement. By dedicating time to regular exercises and self-assessment, you’ll refine your technique.
Tips for Beginners
When starting out with skull drawing, it’s essential to establish a solid foundation. Begin by practicing basic forms and shapes, such as spheres, cylinders, and cones, which will later translate into creating realistic skulls. A simple exercise is to draw several spheres of varying sizes, focusing on capturing their curves and proportions.
Start with simple skull drawings from the side or front view, gradually increasing complexity as you become more comfortable with rendering bone structure and features like eye sockets and nasal cavities. Keep in mind that mastering the subtleties of skull anatomy will take time and practice. To stay motivated, set aside a specific time each day or week to work on skull drawings.
Experiment with different drawing media, such as pencils, charcoal, or ink, to discover which works best for you. Don’t be too hard on yourself if your initial attempts appear crude – it’s normal for beginners to produce imperfect work. Instead, focus on making progress and observing the incremental improvements between each session. Regular practice will help you develop your skills and build confidence in drawing skulls.
Common Mistakes and Challenges
When drawing skulls, many artists fall into the trap of relying too heavily on reference images. While it’s essential to study and learn from others’ work, over-reliance on references can stifle creativity and prevent you from developing your own unique style.
A common mistake is failing to capture the skull’s subtleties, such as the delicate curves of the orbits or the gentle slope of the forehead. To overcome this challenge, focus on observing the underlying structure of the skull rather than just its surface features. Pay attention to the way the bone and cartilage intersect, and try to convey a sense of weight and volume in your drawing.
Another pitfall is neglecting to consider the skull’s texture and pattern of bone growth. The skulls we see in reference images are often clean and polished, but real skulls have rough, porous surfaces with visible ridges and grooves. To add depth and authenticity to your drawings, experiment with different textures and patterns, using a range of line weights and hatching techniques to suggest the skull’s organic, three-dimensional form.
Frequently Asked Questions
How to Mix Media Techniques for a More Realistic Skull Drawing?
The article covered various drawing techniques, but what about combining media like pencils and charcoal or adding digital painting? You can mix media by using the initial pencil sketch as a base and then layering charcoal or ink to add depth and texture. Experiment with different combinations to achieve the desired look.
Can I Draw a Skull Realistically if I’m Not Familiar with Human Anatomy?
Yes, you don’t need extensive knowledge of human anatomy to draw realistic skulls. Focus on capturing the proportions and basic shapes, then build upon those foundations. Practice regularly, and you’ll develop your skills over time.
How Long Does It Take to See Improvement in My Skull Drawings?
The amount of time it takes to see improvement depends on individual progress and practice frequency. Regular sessions (20-30 minutes) 2-3 times a week can help you notice improvements within a few weeks or months. Set realistic goals, be patient, and track your progress.
What if I Get Stuck on Capturing Facial Expressions?
Capturing facial expressions can be challenging. Focus on the subject’s overall demeanor rather than individual features. Pay attention to subtle cues like eyebrows, lips, and jawline angles. Practice observing people and drawing from life or photographs to develop your skills.
How Can I Make My Skull Drawings More Dynamic and Engaging?
To create more dynamic skull drawings, experiment with different perspectives, lighting setups, and atmospheric effects. Consider using chiaroscuro techniques to create contrast between light and dark areas. Don’t be afraid to try new approaches and adjust as needed based on the subject’s character or mood.