Drawing manga faces can be intimidating, especially when you’re just starting out. The exaggerated features and detailed expressions in manga art can make it seem like a daunting task to capture them on paper. However, with some practice and guidance, anyone can learn to draw realistic-looking manga faces step by step. Understanding the proportions of a manga face is key to getting the details right, from the shape of the eyes to the curve of the eyebrows. In this guide, we’ll walk you through the process of drawing manga faces, covering everything from basic expressions to more advanced techniques for adding depth and emotion. By the end of this step-by-step guide, you’ll be able to confidently draw a variety of manga face styles, each with its own unique expression and character.
Understanding Manga Face Structure
Understanding the structure of a manga face is crucial for creating believable and expressive characters, so let’s break down its key components. We’ll focus on the proportions and features that make up a typical manga face.
Basic Facial Features in Manga
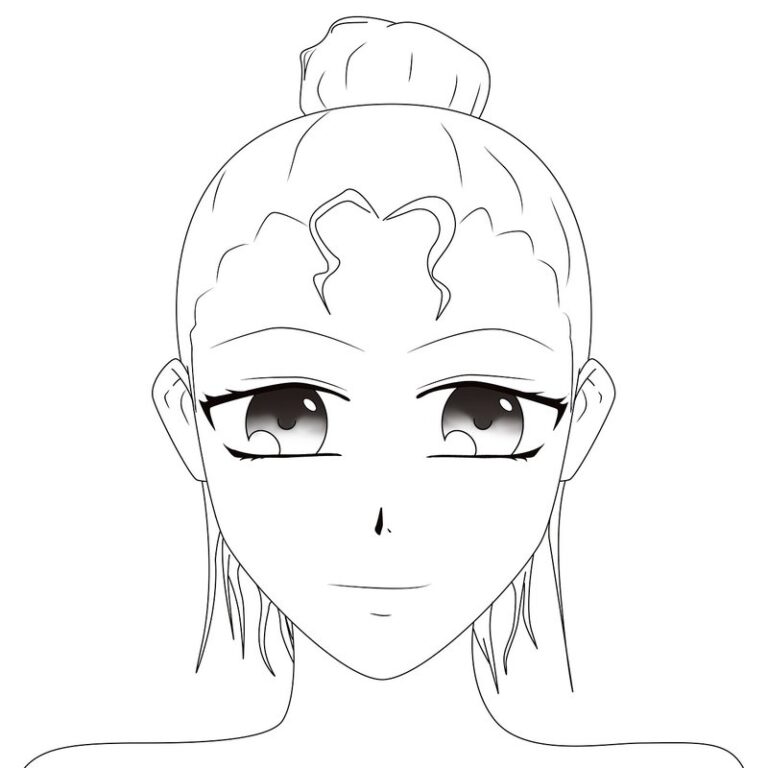
In manga faces, facial features are simplified and stylized to create a distinctive look. Unlike realistic art, where every detail is meticulously rendered, manga artists focus on capturing the essence of a character’s expression through basic shapes and proportions. The eyes, for example, are typically large and almond-shaped, with thin eyebrows and minimal eyelashes. The nose is usually small and pointed, while the mouth is often depicted as a curved line without lips or teeth.
The overall shape of the face in manga is also different from realistic art. Manga faces tend to be more angular, with sharp jawlines and prominent cheekbones. The facial structure is often simplified into basic shapes, such as circles for the eyes and a triangle for the nose. This stylization allows artists to convey emotions and personality through bold lines and minimal details.
When drawing manga faces, remember that the goal is not to replicate realistic features but to create a unique and expressive character design. Focus on capturing the essence of your subject’s expression by simplifying facial features into basic shapes and proportions. Experiment with different styles and techniques to find what works best for your artwork.
Key Proportions for a Perfect Manga Face
A standard manga face is composed of specific proportions that create a harmonious balance. The width of the eyes is typically around 1.5 to 2 times the distance between them, with the outer corners slightly raised. The nose is roughly one-quarter of the face’s width, usually about 3-4 mm long and 1-2 mm wide. The mouth is often wider than it is tall, with a gentle curve upwards at the edges.
The jawline, which can vary depending on the character’s age and personality, typically extends from just below the nose to the chin. A general rule of thumb is for the distance between the bottom of the nose and the top of the chin to be about 1/3 of the face’s width.
Illustrators often use a grid or guidelines to help them achieve these proportions accurately. By breaking down the face into smaller sections, you can focus on getting each element in place before moving on to more intricate details. For example, if you’re working with a 10 cm wide face, the nose would be approximately 2-3 mm long and 1 mm wide.
The Significance of Facial Expressions in Manga
Facial expressions play a crucial role in conveying emotions and character traits in manga. By exaggerating facial features, artists can effectively convey the subtleties of human emotion, creating a more engaging and relatable story. However, excessive exaggeration can detract from the overall effect, making the character look comical or even grotesque.
The degree of exaggeration depends on the intended mood and tone of the scene. For example, in dramatic scenes, subtle changes in facial expressions can convey intense emotions, while more extreme exaggerations might be used for comedic effect. Understanding how to balance subtlety with impact is essential for creating believable characters.
To enhance your manga faces, consider varying the degrees of curvature and angularity in facial features. A slightly upturned or downturned mouth can significantly alter a character’s expression. Similarly, changing the shape or size of eyes can convey emotional shifts. By experimenting with different levels of exaggeration, you can develop a unique visual language that suits your story’s tone.
In manga, facial expressions are not just about conveying emotions but also about revealing character traits and backstory. A well-designed face can hint at a character’s personality, making them more relatable to the reader.
Sketching Basic Shapes for Manga Faces
To create a solid foundation, let’s start by sketching basic shapes that will help you build and refine your manga face drawings. Begin with simple oval and circle forms.
Understanding the Importance of Guidelines
Guidelines are essential when creating manga faces because they allow you to establish accurate proportions and positioning of facial features. Without guidelines, it’s easy to get carried away with drawing details without considering how they fit into the overall face shape.
To set up these guides, start by lightly sketching a vertical line down the center of your paper to serve as a guide for the facial profile. Then, draw horizontal lines across the page at specific intervals to represent the top and bottom edges of the face. The exact placement of these lines will depend on the type of manga you’re drawing, but typically they are spaced about one-third from the top and two-thirds from the bottom.
The most common guideline system used in manga drawing is based on a grid, with five equal horizontal sections representing the different parts of the face: forehead, eyebrows, nose, mouth, and chin. By using this grid as a reference point, you can ensure that your facial features are evenly proportioned and correctly positioned relative to each other.
Basic Shape Drawing Techniques
When drawing basic shapes for manga faces, it’s essential to focus on capturing the essence rather than striving for realism. This means simplifying complex features and emphasizing the overall structure of the face. To achieve this, start by breaking down the face into three primary shapes: a large oval or circle for the head, a smaller circle or egg shape for the face, and a triangle or trapezoid for the nose.
Use simple lines to define these shapes and avoid over-detailing. This will help you capture the character’s likeness while maintaining a stylized aesthetic. Digital tools like Adobe Illustrator or Clip Studio Paint can aid in this process by allowing you to create precise guidelines and adjust proportions easily.
To further refine your basic shape drawing, practice combining simple shapes to form more complex features. For example, use two overlapping circles for the eyes or an oval with a pointed tip for the nose. Remember that these shapes should be simplified representations rather than photorealistic depictions.
Combining Shapes: From Simple to Complex
When combining basic shapes into a cohesive manga face, balance and harmony are crucial to avoid visual clutter. A well-balanced face is not necessarily symmetrical; it’s more about creating a sense of equilibrium through thoughtful placement of features.
Start by dividing the face into thirds both horizontally and vertically. Place key features along these lines or near their intersections for a visually appealing composition. For example, place the eyes at or slightly above the midpoint between the eyebrows and the nose tip. The mouth should be centered below the nose or just below the horizontal line intersecting with the outer corners of the eyes.
Achieve harmony by repeating shapes and proportions throughout the face. Use subtle variations in size and angle to create a sense of depth and interest. Avoid overwhelming the face with too many details; instead, balance busy areas with simpler features. Consider the overall mood or emotion you want to convey – a calm expression may benefit from softer lines and fewer details, while an energetic one might be enhanced by more dramatic shading.
For more complex faces, try combining multiple basic shapes to create unique features. For instance, use a rounded triangle for the jawline and a curved line for the hairline. By mastering these advanced techniques, you’ll be able to craft diverse manga face designs that engage your audience’s attention.
Refining Manga Face Details
Now that you have a basic manga face shape down, let’s focus on adding subtle details to create a more realistic and expressive look. We’ll refine those delicate features next.
Adding Eyes – The Window to the Soul
Manga eyes are often described as windows to the soul, and for good reason – they convey a character’s emotions, personality, and depth. To draw manga eyes effectively, it’s essential to understand their proportions and shape.
In manga, the eye is typically drawn with an oval or teardrop shape, rather than a perfect circle. The height of the eye is usually around 1/3 to 1/4 of the total face height. This means that if you’re drawing a character with a relatively small nose-to-chin length, their eyes should be proportionally smaller as well.
When it comes to details like eyelashes and pupils, less is often more. A few strategically placed eyelashes can add a lot of character to your manga eyes, while a large pupil or iris can make the eye look cartoonish. Consider using a range of 3-5 lashes on each upper lash line for a balanced look.
To add depth to your characters’ eyes, experiment with different iris colors and patterns. A simple ring pattern or a subtle gradient can go a long way in making your character’s eyes pop.
Noses, Mouths, and Jawlines: Defining Facial Features
When drawing manga faces, it’s easy to overlook facial features beyond just the eyes. However, each feature plays a crucial role in conveying character personality and overall expression. Let’s take a closer look at noses, mouths, and jawlines.
The nose is often underemphasized or exaggerated in manga drawings, but a well-proportioned nose can add depth to your character’s face. Consider the shape and size of your character’s nose – is it small and rounded, or large and pointed? The mouth is also essential for conveying emotions, from subtle smiles to dramatic frowns. Pay attention to the shape and curvature of the lips, as well as their relationship to the rest of the facial features.
The jawline can either add structure and definition to your character’s face or make it appear soft and rounded. A sharp jawline typically suggests a more confident or assertive personality, while a softer jawline may indicate a more gentle or introverted one. When drawing these features, remember that subtlety is key – avoid overemphasizing any single facial feature to create an unbalanced look.
Hair and Skin Tones in Manga Faces
Manga artists often use hair as a stylistic element to convey character traits and emotions. A character’s hairstyle can greatly influence their overall appearance, from elegant and refined to messy and unkempt. For instance, a ponytail or bun can signify maturity and sophistication, while loose, flowing locks may represent youthfulness and carefree spirit.
Skin tones in manga are typically depicted with a range of subtle variations rather than realistic representations. This stylistic choice allows artists to focus on the character’s personality and emotions rather than their physical appearance. Skin tones might be exaggerated for dramatic effect or subtly nuanced to create a sense of depth. For example, characters may have bright, sun-kissed complexions to convey happiness and optimism or darker skin tones with subtle undertones to suggest sadness or introspection.
To achieve these stylized representations, manga artists often rely on simple color palettes and bold brushstrokes. By limiting their color choices, they can create a cohesive visual style that enhances the overall narrative.
Advanced Techniques for Realistic Manga Faces
Now that you’ve mastered basic manga face shapes and expressions, it’s time to take your skills to the next level by learning advanced techniques for creating incredibly realistic faces. This section will focus on refining those details that make a character truly unforgettable.
Capturing Light and Shadows
Capturing light and shadows is crucial for creating depth and visual interest on a manga face. In traditional manga art, capturing realistic light and shadow effects can detract from the stylized aesthetic. To achieve this balance, you need to focus on suggestion rather than realism.
One technique used in manga is to indicate the direction of light by using subtle gradations of shading. This creates a sense of depth without making the face look overly realistic. For example, a gentle gradient can suggest that light is coming from the top left, adding volume to the forehead and highlighting the nose.
Another approach is to use high-contrast shadows to create dramatic effects. A well-placed shadow can add drama to an expression or emphasize certain features. However, be cautious not to overdo it – too much contrast can make the face look unbalanced.
To achieve these effects, try using a combination of soft and hard shading tools in your preferred medium. Soft pencils or charcoal are ideal for creating subtle gradations, while harder materials can produce deeper, more defined shadows. Experiment with different techniques to find what works best for you.
Facial Musculature and Expression
When adding facial musculature and expression to manga characters, it’s essential to strike a balance between realistic representation and stylistic interpretation. In traditional Japanese art, facial expressions are often exaggerated for dramatic effect, but modern manga often blends this stylization with more nuanced, lifelike portrayals.
Start by identifying the emotional state you want your character to convey: is it joy, sadness, or perhaps anger? This will guide your placement and design of facial muscles. For example, a raised eyebrow can indicate surprise or skepticism, while a furrowed brow suggests concern or concentration.
In manga, facial muscles are often simplified into basic shapes – curved lines for cheekbones, angular lines for jawlines – to create a sense of movement and emotion without overwhelming the viewer with detail. This is where your personal interpretation comes in: feel free to experiment with different muscle structures to achieve the desired expression while maintaining a clear, manga-inspired aesthetic.
Keep in mind that facial muscles are not just for conveying emotions; they also play a crucial role in establishing character personality and traits. For instance, a character with a prominent nose or bold eyebrows may be perceived as confident or assertive.
Advanced Proportions and Measurements
When aiming for photorealistic manga faces, you need to consider more precise measurements and proportions. One technique is to use the ‘Golden Ratio’ in conjunction with the traditional 3:4 face shape ratio. The Golden Ratio, approximately equal to 1.618, can be applied by measuring the distance from the bridge of the nose to the outer corner of the eye (approximately one-third) and then dividing that segment in a 2:3 proportion.
To achieve this, you can divide the face into smaller sections using guidelines or measurement lines. For instance, measure the width of the eyes and use that as a baseline for other facial features. You may also apply the ‘ Facial Triangle’ method by drawing an equilateral triangle from the top of the forehead to the chin, ensuring each angle is roughly 60 degrees. This helps in maintaining harmony among different face parts.
Some artists also refer to the ‘3/5ths rule,’ where the upper third of the face encompasses both eyes and eyebrows, while the lower two-thirds include the nose, mouth, and jawline. Understanding these more advanced proportions allows you to break down complex faces into manageable components, resulting in a more realistic and detailed manga face.
Final Touches: Coloring and Shading Manga Faces
Now that you’ve completed the facial features, it’s time to add some personality with color and shading. This is where your manga face comes alive!
Understanding Color Theory for Manga
Manga color theory is built around a limited palette of colors, with a focus on simplicity and clarity. The most commonly used colors are variations of red, blue, green, yellow, and black. This is because these colors provide the best contrast for digital displays and printing, which can sometimes struggle to accurately represent complex color gradations.
The choice of colors also influences the mood and atmosphere of the character. Warm colors like orange and red tend to evoke emotions and create a sense of energy or intensity. Cool colors like blue and green often contribute to a more calming or introspective feel. Pastel shades, meanwhile, are commonly used for softer, more delicate expressions.
Consider the character’s personality and traits when selecting colors. For example, a bright red might suit an energetic protagonist but could clash with a more reserved supporting character. Similarly, muted tones can help to convey vulnerability or sensitivity. By understanding how color contributes to mood and atmosphere, you can use it intentionally to enhance your manga face drawings.
In practice, this means sticking to the core colors while making subtle adjustments to achieve the desired effect.
Basic Shading Techniques for Realistic Manga Faces
When shading a manga face, you want to capture subtle nuances of light and shadow without sacrificing the stylized aesthetic. To achieve realistic yet manga-inspired results, focus on basic techniques that can be executed with a range of tools or software. Soft pencils like 2B or 4B are ideal for creating gentle transitions between values, while harder pencils (6H or 8H) allow for more precise detail work.
Pay attention to where light hits the face – this will help you create a convincing three-dimensional effect. For example, the bridge of the nose tends to catch the most light, so make sure to add some subtle shading there. A small, rounded brush can be used to block in larger areas of shadow or to smooth out transitions between values.
When working digitally, use layer blending modes and soft brushes to achieve a similar effect. Experiment with different software settings, such as opacity or flow, to find the perfect balance for your style.
Enhancing Visual Effects with Advanced Techniques
To create detailed visual effects in manga faces, you’ll need a solid understanding of light and shadow manipulation. Start by identifying areas where subtle texture can enhance the face’s appearance. This might involve adding fine lines to mimic skin imperfections or defining the shape of facial features with gentle hatching. Highlighting techniques can also be used to create a sense of depth and dimensionality.
Use a range of shading techniques, including cross-hatching and stippling, to achieve the desired effect. You can also experiment with blending different shades to create soft, gradient-like transitions between light and dark areas. When applying advanced shading techniques, consider the overall style and tone you want to convey in your manga artwork.
For example, if you’re aiming for a more dramatic or intense look, you might emphasize deep shadows and contrasting highlights. In contrast, a softer, more realistic approach might involve subtle gradations of light and shadow that create a sense of three-dimensional depth.
Conclusion
Drawing manga faces can seem intimidating at first, but breaking it down into manageable steps makes it more accessible. By following these steps and practicing regularly, you’ll develop your skills and be able to create a wide range of characters. Keep in mind that practice is key – don’t get discouraged if your early attempts don’t turn out as expected.
You can start by experimenting with different facial expressions and features to find what works best for you. Pay attention to the proportions and placement of each element, from the eyes to the mouth and nose. Experimenting with different styles and techniques will also help you develop your unique voice as an artist.
Frequently Asked Questions
How to choose the right proportions for my character when they have an irregular facial structure?
When creating a manga face with an unusual or irregular facial structure, consider taking inspiration from the character’s personality and traits. You can also experiment with different proportions to find what works best for your specific design. Remember that manga faces often feature exaggerated features, so don’t be afraid to push boundaries when necessary.
Can I use reference images of real people as a basis for my manga characters?
Yes, using reference images of real people can be helpful in creating accurate and detailed manga faces. However, keep in mind that manga faces are stylized representations, so make sure to exaggerate or distort features as needed to achieve the desired look.
How do I balance facial expressions with realistic representation when drawing advanced proportions?
To strike a balance between facial expressions and realistic representation, consider the character’s personality and traits. Experiment with different levels of exaggeration to find what works best for your design. Don’t be afraid to push boundaries while maintaining accuracy.
Can I use digital tools or software to help me draw more accurate manga faces?
Yes, using digital tools or software can be a great way to help you draw more accurate manga faces. Many programs offer pre-made templates and guides specifically designed for creating manga-style artwork. Experiment with different tools to find what works best for your needs.
What if my character’s facial features don’t look consistent when I use advanced techniques like light and shadow?
When working with advanced techniques like light and shadow, it can be challenging to achieve a consistent look across all of your character’s facial features. Try practicing the technique on simpler shapes or objects before applying it to more complex areas.