Drawing a realistic fox can be a challenging task, but with practice and patience, anyone can master the basics. You might have seen beautiful illustrations or paintings of foxes in books, magazines, or even online, and wondered how artists achieve such lifelike details. The key to drawing a convincing fox lies not only in its anatomy and proportions but also in capturing its texture, from the softness of its fur to the sharpness of its features. In this guide, we’ll walk you through the step-by-step process of drawing a fox, covering everything from basic shapes and proportions to advanced techniques for adding realism and depth. By the end of this article, you’ll be able to create your own stunning drawings of these beautiful animals, perfect for art enthusiasts or anyone looking to improve their sketching skills.
Understanding Fox Anatomy and Proportions
Let’s take a closer look at the fox’s unique body shape, proportions, and anatomy that will help you draw it accurately. Knowing these details is crucial for capturing its distinctive features and charm on paper.
Basic Fox Body Structure
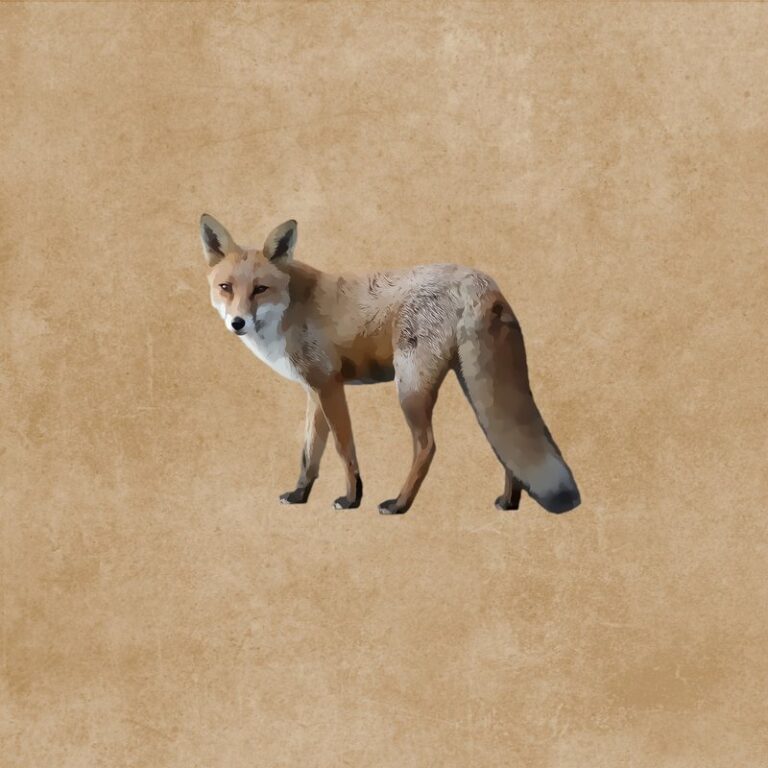
The fox’s body structure can be broken down into several key components: the head, neck, shoulders, back, and tail. These parts work together to create a sleek, streamlined appearance that belies the animal’s agility and cunning.
Start by drawing a rough outline of the head, taking care to capture its distinctive shape and proportions. The fox’s head is roughly one-quarter the length of its body, with the muzzle making up about half of that. Note how the muzzle tapers slightly towards the nose, giving the fox a pointed appearance.
Next, draw a gentle curve for the neck, allowing it to flow smoothly into the shoulders. The shoulders themselves are broad and sloping, providing a sturdy base for the fox’s powerful legs. As you move down the body, the back should be long and level, with a slight indentation just behind the front legs. Finally, the tail is long and bushy, serving as an additional balance point when the fox is in motion.
In terms of proportion, remember that the head should be roughly one-quarter the length of the body, while the shoulders are about one-third down from the top of the head. Use these guidelines to help you draw a balanced and convincing fox body structure.
Measuring and Drawing the Fox’s Facial Features
To accurately measure and draw the fox’s facial features, start by dividing the face into thirds both horizontally and vertically. This will give you a clear guideline for placing the eyes, nose, and mouth in proportion to each other and to the rest of the head. The eyes should be about one-third of the way down from the top of the head, with the nostrils directly below them.
The ears are also an important aspect of the fox’s facial features. They should be triangular in shape, with the base facing forward and the tip pointing backward. When drawing the ears, pay attention to their size and placement relative to the eyes and nose. A general rule of thumb is that the ears should be about one-third the length of the head.
When it comes to proportions, remember that the fox’s face is slightly longer than it is wide. This means that the distance between the eyes should be roughly equal to the width of one eye, with the nose and mouth placed below them in a gentle curve. By following these guidelines and paying close attention to proportions, you can create a more realistic and accurate drawing of the fox’s facial features.
Sketching the Fox’s Body and Limbs
Now it’s time to focus on drawing the fox’s body and limbs, paying attention to proportions and placement of features for a believable result. Begin by sketching the overall shape of the body.
Basic Gestures for the Body
When drawing a fox, it’s essential to capture its overall posture and stance. Start by thinking about how the body is positioned on its legs. Imagine the fox as a relaxed, yet alert creature. Begin with simple gestural drawings that convey this sense of calm readiness.
Draw a rough oval for the body, keeping in mind that it should be slightly longer than wide. Pay attention to where the shoulders meet the neck and where the hips taper towards the tail. The forelegs should be positioned slightly forward of the hind legs, but not so far forward that they seem out of balance.
To capture movement, think about how the body would shift as the fox changes direction or picks up speed. Imagine a gentle lean to one side, with the weight transferred onto the corresponding leg. You can also experiment with drawing the fox in mid-stride, capturing the dynamic tension between its muscles and bones.
Remember, these basic gestures should be loose and expressive, focusing on the overall shape and form of the body rather than precise details. By practicing these simple drawings, you’ll develop a better understanding of how to convey the fox’s posture and movement in your art.
Drawing the Forelegs and Paws
When drawing the forelegs and paws of your fox, it’s essential to get their proportions right. The front legs should be slightly longer than the hind legs, with a gentle slope from the shoulder to the elbow joint. To achieve this, imagine a 2:3 or 1:2 ratio between the length of the upper leg (thigh) and the lower leg (calf). This will help you create a balanced and harmonious composition.
Pay attention to the foreleg’s structure, with a slight curve in the upper arm and a more defined muscle mass around the shoulder. The paw should have five toes, with the front two toes being slightly longer than the others. When it comes to texture, fox paws are typically smooth with a subtle sheen, so avoid excessive detailing or shading.
To draw the claws, start by adding thin, curved lines at the base of each toe. You can also use gentle hatching or cross-hatching to suggest the texture and shape of the individual claws. Remember that the front paws should be slightly more prominent than the hind paws, with a subtle forward lean to create a sense of movement and energy.
Adding Texture and Detailing
Now that you have a solid foundation of your fox’s shape, let’s add some texture to bring it to life. This is where your drawing really starts to feel like a realistic fox.
Basic Fur Patterns and Textures
Fox fur is composed of two main layers: guard hairs and undercoat. The guard hairs are long, stiff strands that provide insulation and protection against the elements. They’re often coarser than human hair and can appear quite thick on a fox’s body. In contrast, the undercoat is softer and denser, trapping warm air close to the skin to keep the fox insulated.
When drawing a fox, it’s essential to capture these distinct textures. You can start by indicating the guard hairs with short, curved strokes, focusing on areas like the back, shoulders, and tail. The undercoat should be depicted as softer, more even lines that follow the contours of the body.
Don’t forget about the whiskers – long, coarse hairs around the muzzle that help a fox detect prey in low light conditions. You can draw these as thin, wispy lines or thicker, more textured strokes depending on their length and appearance. When rendering fur textures, remember to observe how they interact with the surrounding environment – for example, guard hairs may be blown back by wind or tangled in vegetation.
Drawing the Eyes and Eye Expression
Drawing the eyes of a fox is where personality and emotion truly shine through. To start, ensure the eye shape is slightly almond-like, with the top edge being more rounded than the bottom. Position the eyes about one-third down from the top of the head, with the inner corners aligned directly above the outer edges of the nose. The size of the eyes should be in proportion to the fox’s overall face – a good rule of thumb is that they should be roughly one-fifth the width of the head.
For expression, consider whether your fox is alert and perked up or relaxed and sleepy. The latter will have slightly droopy eyelids and less prominent pupils. To convey emotion through the eyes, focus on the shape and size of the pupils – larger pupils indicate excitement or aggression, while smaller ones suggest calmness. You can also use the eyebrows to add nuance – a raised brow can imply curiosity or concern. Remember that foxes often have a subtle upward tilt to their head when alert, which adds to the overall energetic feel of their gaze.
Advanced Techniques for Realism
To take your fox drawing skills to the next level, we’ll explore more advanced techniques that will capture its subtle fur patterns and textures. Mastering these details is key to a realistic fox portrait.
Refining Proportions and Measurements
When refining proportions and measurements, it’s essential to understand how they relate to each other. One way to achieve accuracy is by using the fox’s body length as a reference point. Measure from the tip of the nose to the base of the tail, keeping in mind that this will be your primary unit of measurement. This technique helps you maintain consistency throughout the drawing.
For example, in most adult red foxes, the head and neck make up about one-third of the body length, while the torso accounts for approximately half. The tail can range from 10 to 15% of the total body length. By applying these ratios, you’ll be able to accurately place features like the ears, shoulders, and hind legs.
To simplify this process, divide your drawing paper into four sections: head/neck, torso, forelegs/paws, and hind legs/tail. Measure each section as a proportion of the total body length, using a ruler or a measuring tool. This will help you keep track of measurements and proportions, resulting in a more realistic representation of the fox’s anatomy.
Adding Shading, Shadowing, and Ambient Occlusion
To create depth and dimensionality in a fox drawing, you need to add shading, shadowing, and ambient occlusion. Start by observing how light falls on the subject – pay attention to areas where shadows are deep, like under the chin, around the eyes, and between the toes.
When adding shading, focus on creating smooth transitions between lighter and darker areas. Use gentle hatching or cross-hatching techniques with a range of line weights to suggest volume and texture. For example, use softer lines for the fox’s back and harder lines for its ears and face.
Shadowing is key in creating realistic lighting effects. Identify three main light sources – usually from above, below, and the side – and block them out using soft, gentle shapes. Refine these areas by adding more defined shadows with darker values. Ambient occlusion adds subtle depth to a drawing by suggesting where one form meets another.
To achieve ambient occlusion, look for areas where forms intersect or overlap – like the fox’s body, legs, and tail. Use darker values to suggest this interaction, but be careful not to overdo it; too much ambient occlusion can create an overly dark and flat appearance.
Tips and Tricks for Drawing Foxes
When drawing foxes, it can be tricky to capture their unique features and personalities, but a few expert tips can make all the difference in your artwork. To help you achieve a more realistic and endearing fox portrait, here are some helpful hints.
Common Mistakes to Avoid
When drawing foxes, it’s easy to get caught up in certain habits that can lead to inaccurate proportions and expressions. One common mistake is making the head too large or too small compared to the body. This can throw off the entire balance of the drawing. To avoid this, measure your fox’s facial features carefully and use a gentle approach when sketching their face.
Another pitfall is neglecting to capture the subtle tilt of a fox’s ears. Foxes often have their ears slightly angled forward or back, adding depth and interest to their expression. Try experimenting with different ear positions to see what works best for your drawing.
Additionally, don’t be afraid to pay attention to the subtle details in a fox’s fur texture. Foxes have thick, dense coats that can appear mottled or patchy in certain lighting conditions. To capture this effect, try using short, loose brushstrokes or hatching techniques to suggest the texture of their fur.
When drawing a fox’s tail, be mindful of its position and tension. A fox’s tail is often held high and with a subtle curl, adding a sense of dynamic movement to their pose.
Inspiration from Real-Life Observations
When observing foxes in their natural habitats, pay attention to their posture and movement. Note how they carry themselves when walking, running, or standing still. For example, a fox may hold its ears back when feeling threatened or tuck them forward when sensing prey nearby. Observe the way it moves its tail, too – often held high for balance or low when demure.
Study the way a fox’s fur lies flat against its body in certain areas and stands on end in others. This texture is crucial to capturing its realistic appearance. Watch how the light catches its coat, casting shadows and creating highlights that give it depth and dimension.
Take note of a fox’s behavior in different environments – from dense forests to open fields. How does it interact with its surroundings? Does it seem wary or confident? These observations will help you capture its spirit and personality in your drawings. By studying the way a fox moves, interacts, and presents itself in real life, you can create more authentic and engaging drawings that reflect its unique characteristics.
Practice Exercises and Prompts
Now that you’ve learned how to draw a fox, it’s time to put your skills into practice. Try these exercises to loosen up your drawing style and capture the fox’s unique spirit.
Simple Gestural Drawings
To develop your skills and build confidence in drawing foxes, start with simple gestural drawings. These exercises focus on capturing basic fox poses and movements using quick gestures. Begin by sketching a rough outline of the fox’s body, emphasizing its overall shape and proportions. Use simple lines to convey movement: for example, a flowing curve to indicate the neck, or a series of short strokes to suggest the tail.
Practice drawing the fox in various dynamic poses, such as jumping, running, or sitting. Focus on capturing the energy and movement rather than precise details. To add some variety, try sketching multiple foxes in different scenarios: perhaps one leaping through grass while another pads quietly through the forest. As you work, pay attention to how the fox’s body language conveys its emotions and intentions.
For an added challenge, set a timer for 10-15 minutes and complete as many gestural drawings as possible within that time frame. This will help you develop your observational skills and build speed without sacrificing accuracy. Experiment with different media and tools: pencils, pens, or even digital drawing apps can all be used to create expressive and dynamic fox gestures.
Advanced Drawing Prompts
Drawing realistic foxes requires more than just mastering basic proportions and anatomy. To take your skills to the next level, try these advanced drawing prompts: draw a fox in mid-stride, with its hind legs slightly raised off the ground; capture the intricate texture of a foxy winter coat by depicting fur that’s matted and tangled from the cold weather; or depict a fox in a dynamic pose, with its body twisted to follow an imaginary trajectory. These exercises will help you practice capturing movement and energy in your drawings.
When drawing complex scenes like these, it’s essential to pay attention to subtle details that convey realism. For instance, study how light interacts with the fox’s fur to create shadows and highlights. To achieve this, try using a range of values (light and dark) to create depth and dimensionality in your drawing. Another common challenge is accurately rendering the fox’s ear shape and placement – pay attention to the way it folds back against its head, and use gentle curves to capture its softness.
By mastering these techniques and overcoming obstacles, you’ll be able to draw more believable and engaging foxes that leap off the page.
Frequently Asked Questions
How to achieve smooth transition between facial features and body in my fox drawings?
In order to create a cohesive and realistic drawing of a fox, it’s essential to pay attention to the proportions and anatomy discussed in the article. When transitioning from facial features to the body, focus on maintaining the correct proportions by using gentle curves and smooth lines. Practice gestural drawings to get a sense of the overall shape and form of the fox.
Can I use reference images for drawing specific details like fur texture or eye expression?
Yes, you can definitely use reference images to help with intricate details such as fur texture or eye expression. However, remember that your goal is to create a unique representation of the fox, so don’t be afraid to experiment and interpret the reference images in your own way.
How do I balance realism with creativity when drawing a fox’s fur patterns?
When it comes to drawing realistic fur patterns, focus on understanding the underlying structure and texture of the fox’s coat. Study real-life examples of different fox species and their unique markings. At the same time, don’t be afraid to get creative and experiment with various techniques to achieve the desired look.
What if I struggle to draw the eyes of a fox? Should I just stick to simpler subjects?
No, you shouldn’t stick to simpler subjects! Drawing the eyes of a fox can be challenging, but with practice and patience, anyone can master it. Focus on understanding the anatomy of the eye socket, eyelids, and iris, as discussed in the article. Use reference images to study the shape, size, and position of the eyes in different contexts.
Can I draw a fox from multiple angles or perspectives using the techniques outlined in this guide?
Yes, once you’ve mastered the basics, feel free to experiment with drawing the fox from various angles and perspectives. The key is to understand how the proportions and anatomy change as the animal’s pose shifts. Practice gestural drawings of the fox in different poses to develop your skills and confidence.