Mastering figure sketching poses is an essential skill for any artist looking to improve their drawing and artistry. You can’t capture the subtleties of human movement and anatomy if you don’t have a solid foundation in pose work. It’s not just about getting the basics right, either – as you advance as an artist, you’ll want to be able to convey dynamic energy and motion through your sketches. But where do you start? In this article, we’ll cover everything from basic anatomy to advanced movement capture and gesture drawing techniques. You’ll learn how to break down complex poses into simple shapes, how to create the illusion of weight and tension in your drawings, and how to capture the subtleties of human movement with confidence. By the end of this guide, you’ll be able to create nuanced, expressive sketches that showcase your artistic skills.
Understanding the Basics
Figure sketching is a fundamental skill that requires a solid understanding of basic poses and anatomy. Let’s start by breaking down the essential elements of figure drawing, including proportion, line, and value.
The Importance of Figure Drawing
Figure drawing is a fundamental skill for artists to master, and its importance cannot be overstated. By regularly practicing figure drawing, you’ll develop your observational skills, which are essential for capturing the subtleties of human form and gesture. Through figure drawing, you’ll learn to see and understand proportion, movement, and anatomy in a way that’s both accurate and aesthetically pleasing.
When observing the figure, it’s not just about rendering the physical appearance; you’re also studying how the body moves and interacts with its surroundings. This requires attention to detail, as small nuances can make or break the believability of your drawing. For instance, consider the way a person sits in their chair – the tension in their muscles, the subtle shift in weight distribution, and the movement of their joints.
To effectively practice figure drawing, it’s essential to start with simple exercises that focus on proportion and gesture. Try sketching the figure from different angles or using quick poses to capture movement and energy. Regular practice will help you develop your observational skills and give you a solid foundation for tackling more complex subjects in your art.
Basic Anatomy Review
When it comes to figure sketching, understanding human anatomy is crucial for accurately capturing poses. Start by familiarizing yourself with the skeletal system, which provides the foundation for the body’s structure. The torso consists of 24 ribs, a sternum, and a spine that extends from the base of the skull to the tailbone. Identify key landmarks such as the pelvis, shoulder blades, and collarbones, which are essential for proportion and placement.
The skeletal system is divided into two main sections: the upper body (torso, shoulders, arms) and lower body (pelvis, legs). Focus on understanding how these sections interact with each other. For example, observe how the pelvis supports the spine and how the shoulder blades articulate with the ribcage.
To apply this knowledge in your figure sketching, practice identifying key landmarks and bone structures in reference images or models. Study the relationship between different body parts and how they work together to create movement and posture. A basic understanding of human anatomy will help you achieve more accurate and confident sketches. By building a strong foundation in skeletal structure, you’ll be better equipped to capture dynamic poses and gestures with ease.
Selecting and Setting Up Poses
When selecting poses for figure sketching, it’s essential to consider both your subject’s anatomy and your own artistic goals. Let’s break down the key factors to consider when choosing a pose that works for you.
Choosing the Right Model or Reference Image
When selecting a model or reference image for practice, consider the age range and body type. Working with models of different ages can help you adapt to changing proportions and muscle development. For instance, working with younger models can aid in understanding the more delicate features and less defined muscles of adolescence, while older models will reveal the effects of aging on the body.
In terms of body type, having a diverse range includes slender, athletic, and heavier builds, as well as those with unique characteristics such as scoliosis or other conditions. This variety allows you to study the interaction between bone structure, muscle mass, and fat distribution.
A model’s pose is also essential. Aim for reference images that showcase a range of poses, including standing, sitting, reclining, and dynamic movements. Look for images that capture the subtleties of gesture, weight transfer, and balance.
When using reference images, consider the quality of the lighting. Soft, natural light can be more forgiving than harsh artificial lighting, which can create deep shadows and highlights. Select images with clear backgrounds or those where the model’s figure is isolated to minimize distractions.
Effective Use of Light Sources
When it comes to figure sketching, light sources play a crucial role in capturing the subtleties of the human form. Natural light is ideal for figure drawing, as it provides soft, gentle illumination that highlights contours and textures. When using natural light, position yourself near a window with diffused lighting, such as north-facing or overcast skies. Avoid direct sunlight, which can create harsh shadows and accentuate imperfections.
Artificial light sources, like lamps or overhead lights, can also be effective if used thoughtfully. Softbox lights or umbrella lights are good options for creating soft, even illumination. When using artificial light, position the light source at a 45-degree angle to the model’s face to minimize shadows and accentuate facial features.
To capture subtle shadows, experiment with different lighting setups and angles. Try placing the light source above the model’s shoulder or slightly behind them to create deep, dramatic shadows that add depth and dimension to your drawing. Remember to observe the way light interacts with the model’s body, as it can reveal underlying anatomy and muscle structure. By carefully managing light sources, you can create more realistic and engaging figure sketches.
Mastering Different Types of Poses
Mastering various poses is essential for capturing the subtleties and dynamics of the human form, which can be achieved through a range of techniques. We’ll explore some key pose types to help you refine your figure sketching skills.
Standing Poses
Standing poses are a fundamental aspect of figure sketching, allowing artists to capture the elegance and poise of their subject. A standing pose can convey confidence, strength, or vulnerability, depending on the weight distribution and posture.
To begin with, let’s consider various stances. The most common is the relaxed stance, where the feet are shoulder-width apart and the knees slightly bent. This pose allows for a natural flow of movement and helps to distribute weight evenly between both legs.
Weight distribution plays a crucial role in conveying emotion through art. A standing pose can be either weighted on one leg (such as in a “first position” stance) or evenly distributed, which affects the overall balance and poise of the subject.
Posture is also essential in capturing the essence of a standing pose. Even slight changes in posture can alter the mood and atmosphere of the artwork. For instance, slouching or leaning forward can convey fatigue or introspection, while standing tall with shoulders back can exude confidence and strength.
Seated Poses
Seated poses offer a rich opportunity for capturing balance and proportion in figure drawing. To master seated poses, start by considering the model’s position on the chair. A slouching posture can be just as interesting as an upright one, but it requires careful observation to capture the underlying muscle structure.
Back support is crucial in seated poses. Ensure that the model has adequate lumbar support or sits with a straight back against a wall. This will help maintain a natural spinal curvature and prevent strain on the neck and shoulders. When drawing, pay attention to the subtle contours of the spine and how they relate to the rest of the body.
Leg placement also plays a significant role in seated poses. The model’s feet should be firmly planted on the floor or on a footrest, with knees at or below hip level. This will help maintain balance and prevent the model from leaning forward or backward. Experiment with different leg positions, such as crossed legs or one leg tucked under the other, to capture unique dynamics in your drawings.
When drawing seated poses, focus on capturing the relationships between the body’s various parts, particularly the torso, arms, and legs. This will help you achieve a sense of balance and proportion in your work.
Advanced Techniques for Capturing Movement and Gesture
To truly capture the essence of a pose, you’ll need to master the subtle nuances of movement and gesture. This requires a deep understanding of how to convey energy and emotion through your lines and strokes.
Dynamic Movement Capture
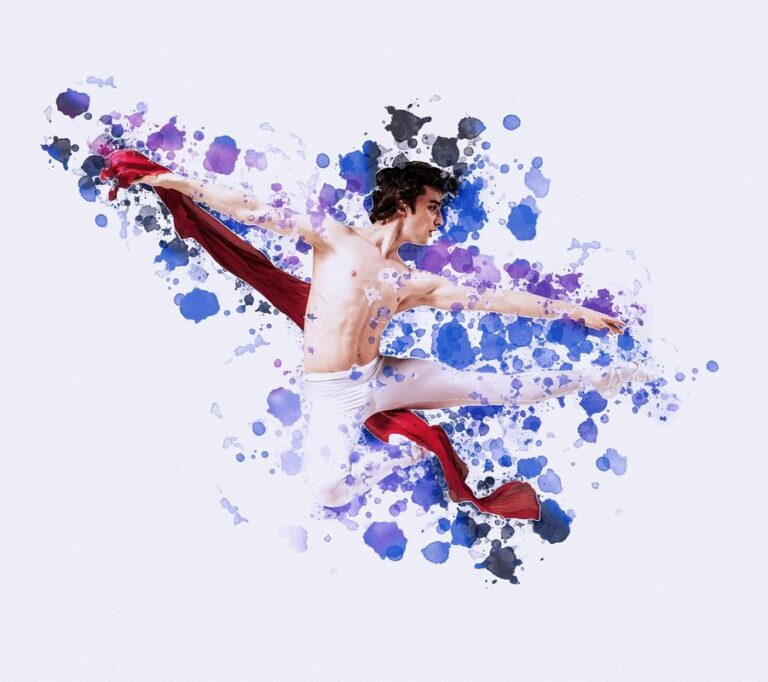
To capture dynamic movement in figure sketches, focus on conveying energy and motion through gestural drawing. This involves using loose, expressive lines to convey a sense of fluidity and dynamism. A good starting point is to study the work of artists who specialize in gestural drawing, such as Egon Schiele or Joan Mitchell.
When attempting dynamic movement capture yourself, try drawing with a range of line weights – from very light to very dark. This will help you convey varying degrees of tension and energy in your subject’s pose. For example, if the model is stretching upwards, use a thicker line for the arm that’s reaching up and a thinner line for the opposite arm.
Consider using simple shapes to break down complex movement into more manageable parts. Divide the body into its major components – head, torso, arms, legs – and focus on capturing the flow of energy between them. For instance, if the model is in mid-stride, try drawing the leg that’s lifting off the ground as a flowing curve, rather than a rigid line.
In terms of specific techniques, experiment with using hatching patterns to convey movement. Try using diagonal or curved strokes to suggest the direction and speed of a subject’s movement.
Long Pose Drawing
Long pose drawing involves holding a single pose for an extended period, typically between 30 minutes to several hours. This technique allows you to capture detailed anatomy and expression with greater accuracy. By working from a sustained pose, you can observe the way muscles relax, tense, or move in a more realistic manner.
When using long poses, it’s essential to take advantage of the extra time to refine your lines, paying close attention to subtleties like finger and facial expressions. Focus on capturing the model’s underlying structure, including bone relationships, muscle mass, and skin texture. To effectively use extended poses, divide your time into thirds: spend one-third observing the pose, one-third drawing it, and the final third reviewing and refining your work.
Some strategies for long pose drawing include breaking down complex areas into simpler shapes, using gesture lines to capture movement, and incorporating subtle hints of anatomy rather than relying on exact measurements. For example, instead of drawing each finger individually, group them together as a single unit, allowing you to focus on capturing the overall hand structure. This approach enables you to convey a sense of life and energy in your drawings while still maintaining accuracy.
Overcoming Common Challenges and Improving Skills
Now that you’ve practiced basic poses, it’s time to tackle more complex challenges and refine your skills in figure sketching. Let’s work through common obstacles and enhance your technique.
Analyzing Your Work: Common Mistakes and Areas for Improvement
When reviewing your figure sketching poses, it’s essential to identify areas for improvement and correct common mistakes. Begin by stepping back from your work and asking yourself: what specifically drew my eye to this piece? Was it the overall pose, or a particular aspect of the anatomy? Consider each area individually – shoulders, torso, limbs, and head – evaluating proportions, alignment, and gesture.
A common error is neglecting to capture subtle muscle definition. To correct this, pay close attention to the transitions between major muscle groups, such as where the shoulder blades meet the ribcage or the bicep merges with the forearm. Another area for improvement might be in conveying weight distribution – consider how your model’s weight-bearing limbs are positioned and rendered.
To identify these issues more effectively:
- Study your reference images: examine how other artists have tackled similar poses, paying attention to specific details you might have overlooked.
- Compare multiple iterations of a pose: notice what changes from one sketch to the next, and use this self-critique process to refine your work.
- Regularly practice long pose drawing: this will help you develop a greater sense of anatomy and gesture.
Practice Exercises for Mastery
To improve accuracy and proportion, focus on exercises that isolate specific skills. For example, practice drawing different body parts in isolation – such as hands, feet, or facial features. Use reference images to ensure accuracy and pay close attention to proportions.
Another set of exercises involves capturing gesture and movement. Set a timer for 30 seconds to one minute and sketch the overall pose without worrying about details. Repeat this process several times with slight variations. This helps develop your ability to capture dynamic movement and energy in your sketches.
Practice drawing from memory is also beneficial. Sketch the figure pose from memory after studying it for a short time, then compare your work to the reference image. Identify areas of improvement and make adjustments accordingly. To improve overall mastery, try a combination of these exercises and incorporate them into your regular practice routine. Focus on one or two skills at a time to avoid feeling overwhelmed.
When selecting poses for practice, consider working with simple, straightforward types like standing or seated figures before moving on to more complex ones like twisted or reclining poses.
Frequently Asked Questions
What if I’m struggling to capture accurate proportions in my figure sketches?
Proportions can be tricky to get right, especially when drawing from reference images. To improve your accuracy, try practicing simple proportion exercises like measuring the length of different body parts and comparing them to each other. You can also use grids or other visual aids to help you gauge proportions more easily.
How do I know if my long pose drawings are truly capturing the subtleties of human movement?
Long pose drawing is all about observing and recording the smallest details of human movement, so it’s natural to wonder whether your efforts are paying off. To get a better sense of whether your long pose drawings are truly capturing dynamic movement, try sharing them with other artists or mentors for feedback – ask for specific comments on what works well and where you can improve.
Can I use digital drawing tools to practice figure sketching poses?
While traditional media like pencils and paper have their own unique benefits, many artists find it helpful to supplement their practice with digital tools. If you’re interested in using a digital drawing app or software for your figure sketching practice, look for options that allow you to easily capture gesture drawings and loose sketches – these can be great ways to loosen up and get a feel for the poses.
What if I’m working on a project that requires quick gesture drawings of figures in motion?
While long pose drawing is excellent for capturing detailed anatomy and expression, it’s not always feasible or relevant for every artistic project. If you need to create quick gesture drawings of figures in motion, try practicing simple gestures like squiggles and lines to capture the overall energy and movement – then use those gestural marks as a starting point for more detailed sketches.
Can I apply figure sketching techniques to drawing other subjects, like animals or landscapes?
While human anatomy is unique, many artists find that they can adapt their understanding of proportions, gesture, and movement to other subjects. If you’re interested in applying your figure sketching skills to other areas, start by observing the gestures and movements of the new subject – ask yourself what kind of poses and stances would capture its essence and character.