Drawing a stunning dress design requires more than just a pencil and paper. It demands an understanding of fashion illustration techniques, a keen eye for detail, and a deep knowledge of the subject matter. Whether you’re a fashion student looking to hone your skills or a professional designer seeking inspiration, learning to draw compelling dress designs is essential for communicating your vision to clients and bringing your creations to life. In this comprehensive guide, we’ll cover the basics of drawing dress designs, from understanding garment construction to mastering advanced techniques like draping and layering. We’ll also explore various methods for creating convincing fabrics, textures, and accessories, as well as tips for refining your style and technique. By the end of this article, you’ll be able to create stunning dress designs that showcase your creativity and attention to detail.
Understanding the Basics of Fashion Illustration
To draw a dress design, it’s essential to understand the fundamental principles of fashion illustration. This section will break down the basics of creating a believable and visually appealing garment.
What is Fashion Illustration?
Fashion illustration has been an integral part of the fashion industry for centuries. Its origins date back to 17th-century Europe, where artists would create intricate drawings of clothing and accessories for wealthy patrons. Today, fashion illustration is a highly respected art form that not only showcases designers’ creativity but also provides a unique visual representation of their designs.
Fashion illustration’s significance extends beyond aesthetics; it plays a crucial role in the design process. Designers use illustrations to communicate their ideas to manufacturers, retailers, and other stakeholders. A well-crafted illustration can convey the essence of a garment, from its silhouette to its texture and embellishments. In the absence of digital tools, fashion illustrations were once the primary means of visualizing designs before production.
To appreciate the value of fashion illustration, look at the works of renowned artists like Paul Iribe, Erté, and René Gruau. These masters not only brought their own unique styles to the art form but also helped shape the industry’s visual identity. By studying their techniques and experimenting with different mediums, you can develop your skills in fashion illustration and create stunning visual representations of dress designs.
Essential Tools for Fashion Illustrators
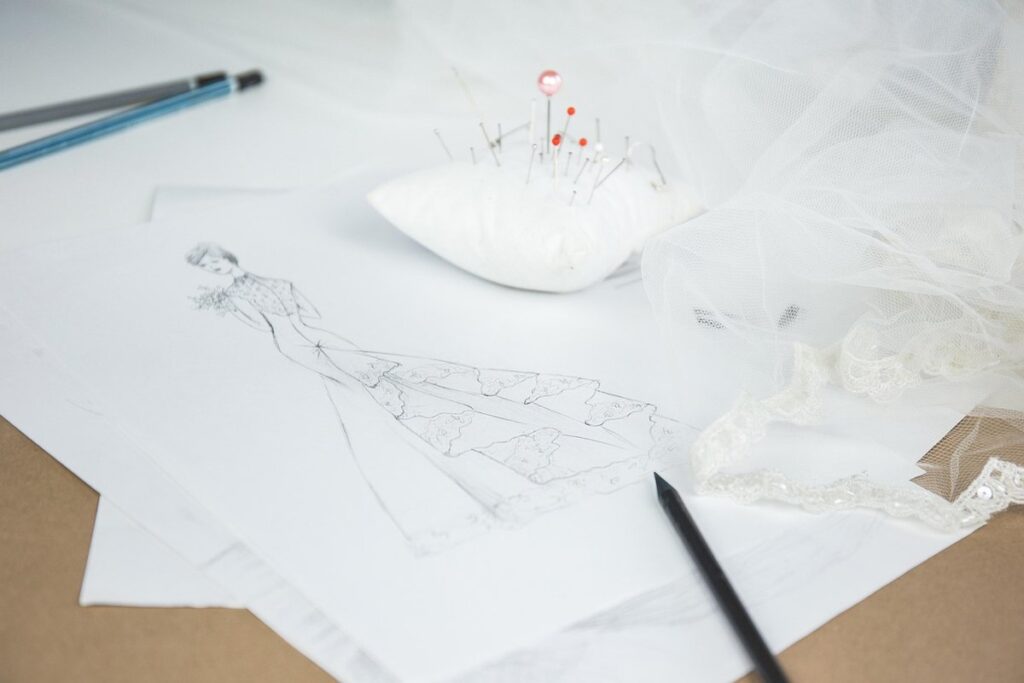
To get started with fashion illustration, you’ll need some basic tools. These can be divided into traditional and digital categories. On the traditional side, a set of graphite pencils (#2, 4, 6) is essential for creating different line weights and values. A sketchpad with smooth paper (at least 80 gsm) will allow you to work on your designs without them bleeding through. Erasers (kneaded or white vinegar) are necessary for correcting mistakes.
In the digital realm, a drawing tablet (such as Wacom or Huion) can be used in conjunction with software like Adobe Illustrator or Photoshop. These programs offer a range of brushes and tools that can mimic traditional media. You may also want to invest in a graphics monitor or external display to improve your working experience.
A computer with a good processor, RAM, and storage will ensure smooth performance when using digital drawing tools. A comfortable chair, desk, and good lighting are also crucial for long hours of work. Consider investing in an ergonomic keyboard and mouse to prevent discomfort.
Developing Your Drawing Skills
To become proficient in drawing dress designs, you’ll need to develop a range of skills, including understanding proportion and balance. Let’s start by breaking down these essential elements.
Basic Shapes and Proportions
When breaking down a dress design into basic shapes and proportions, it’s essential to simplify complex forms. Start by identifying the main components: the bodice, skirt, and sleeves (if present). These can be represented as simple geometric shapes – a rectangle for the bodice, a circle or oval for the skirt, and triangles for the sleeves. Consider the overall proportion of these shapes in relation to each other.
Perspective plays a crucial role in maintaining accuracy. When drawing a dress from different angles, use one-point perspective for front-facing views and two-point perspective for side-facing views. Measure carefully to ensure that proportions are maintained across various viewpoints. For example, if you’re drawing a fitted bodice on the front, make sure it’s proportionate to the skirt in the back.
To achieve accurate measurements, divide the dress into sections: waistline, hip line, and hemline. Use these reference points to draw the underlying shape of the garment. This approach will help you visualize the dress as a 3D form on a 2D surface. By breaking down the design into basic shapes and proportions, you’ll establish a solid foundation for refining your drawing skills and creating more realistic dress designs.
Understanding Fabric Texture and Draping
When depicting fabric texture and draping in your drawings, it’s essential to capture the subtle nuances of how fabric behaves on a three-dimensional body. To achieve realistic folds and creases, try observing real-life references – observe how different fabrics drape on mannequins or models. Note the way delicate fabrics like silk or chiffon create soft, flowing folds, while heavier materials like velvet or corduroy produce more pronounced, rugged textures.
When drawing fabric, focus on suggesting rather than rendering every detail. This means capturing the overall flow and movement of the garment rather than attempting to draw every individual fold. Use gentle, expressive lines to convey the weight and texture of the fabric. For example, you can use short, hatching strokes for smooth fabrics like satin or organza, while longer, more gestural lines work better for textured materials.
To create convincing draping, pay attention to how fabric folds around the body’s curves. Study the way seams, hemlines, and other features interact with each other to create a cohesive whole. Practice drawing different folds – such as pleats, tucks, or ruffles – to develop your skills in conveying fabric texture and movement. Experiment with different materials and techniques to find what works best for you.
Creating a Dress Design from Scratch
To create a dress design from scratch, you’ll need to start by breaking down the overall silhouette into its individual components and proportions. Let’s begin with the basics of shape and proportion.
Sketching and Refining Your Idea
When sketching out a basic dress design, it’s essential to focus on proportion and balance. Start by drawing a simple shape, such as a rectangle or a teardrop, to serve as the foundation for your design. Pay attention to the relationship between the body and the garment – a well-proportioned dress should skim the body, rather than clinging too tightly.
Consider the visual flow of your design: where do you want the eye to travel? A clean line of sight can be achieved by placing key features, such as the neckline or hemline, at strategic intervals. Balance is also important; distribute visual weight evenly across the design to avoid overwhelming one area.
Use simple shapes and lines to block out the overall form before adding details. This will help you refine your idea and make adjustments as needed. For example, if your dress has a flared skirt, start with a simple triangle or oval shape to capture its volume, rather than trying to draw the intricate folds of fabric. By keeping your initial sketch loose and focused on basic shapes, you’ll be able to iterate and fine-tune your design more effectively.
Adding Details and Embellishments
When adding details to your dress design, focus on creating realistic textures and patterns. Start by sketching the placement of buttons, considering their size, shape, and spacing. Use gentle lines and soft shading to suggest the texture of lace or embroidery. To draw lace, use a combination of curved and straight lines, with varying line weights to create depth and dimension.
For embroidered details, draw the outline of the design first, then add the stitches using short, curved lines that follow the shape of the motif. Vary the thickness and tension of the lines to suggest different types of thread or yarn. To capture the intricate patterns found in traditional embroidery, use a small brush or fine-tip pen to create detailed, close-up renderings.
When drawing realistic textures, pay attention to the way fabric drapes over the body. Use gentle folds and soft creases to suggest the natural movement of the fabric. Consider adding subtle details like stitching or seams to enhance the overall texture and realism of your design. By paying attention to these details, you can create a dress design that looks and feels authentic, even on paper.
Drawing Different Types of Dresses
Let’s focus on creating a variety of dress designs by exploring different styles, from flowing gowns to fitted bodices, and more. We’ll break down each type for easy reference.
A-Line Dresses
When drawing an A-line dress, it’s essential to focus on its signature silhouette. The A-line shape is characterized by a fitted bodice and a flared skirt that’s wider at the hem than at the waist. To capture this look on paper, start by sketching the basic shape of the dress, paying attention to the proportions between the bust, waist, and hips. Remember, an A-line dress skims over the body, so aim for a smooth, fluid line rather than sharp angles.
To add depth to your drawing, consider the fabric texture and drape of the skirt. A-line dresses often feature full, flared skirts that create movement when worn. Suggest this movement by adding gentle folds or waves to the fabric, using soft, flowing lines to convey a sense of energy.
In terms of embellishments, A-line dresses are often adorned with delicate details such as florals, lace, or tiny buttons. To draw these elements effectively, focus on simple shapes and clean lines, rather than trying to render intricate patterns. Keep your embellishments balanced and proportional to the overall design, avoiding clutter that can detract from the dress’s streamlined silhouette.
Fit-and-Flare Dresses
To draw a fit-and-flare dress, focus on capturing its defining features. The waistline is typically higher than an A-line dress, accentuating the bust and creating a more hourglass silhouette. As you sketch, pay attention to the hip curve, which should be smooth and continuous. The skirt volume of a fit-and-flare dress is also distinct, with a flared shape that starts just below the waistline.
When drawing the dress’s bodice, use gentle, curved lines to suggest the bust and shoulder slope. Avoid sharp angles or hard edges, as these can disrupt the fluidity of the silhouette. The skirt, on the other hand, should be more structured, with a clear distinction between the flare and the hem.
To achieve a convincing fit-and-flare effect, consider the following:
- Balance the width of the skirt with the narrowness of the bodice.
- Use soft, flowing lines to convey the movement of the dress.
- Pay attention to proportion, ensuring the waistline is in harmony with the overall length and volume of the dress.
Working with Different Fabrics and Textures
When creating a dress design, it’s essential to consider how different fabrics and textures will affect its overall look and feel. Let’s explore some key tips for working with various materials effectively in your design.
Drawing with Different Fabrics
When depicting different fabrics, consider their unique textures and drape. For example, cotton tends to have a loose, relaxed fold, while silk drapes elegantly with a soft sheen. Velvet, on the other hand, has a thick pile that can be convincingly rendered with short, layered strokes.
To create realistic texture, observe how the fabric catches light: does it absorb or reflect it? Use this information to guide your shading and value choices. For instance, if you’re drawing silk, use smooth, gentle hatching to suggest its lustrous quality. If you’re depicting velvet, use more aggressive, layered strokes to capture its plush texture.
Pay attention to the way fabrics drape on the body. Observe how they fold, crease, and flow in different positions. This will help you accurately render the folds and drapery of your dress design. For example, if drawing a silk gown, consider how the fabric would fall from the shoulders: would it cascade down the back or pool at the hem? Study the way real fabrics behave to infuse your drawings with authenticity and detail.
Adding Embellishments and Details
When adding embellishments like lace, ruffles, and beading to your dress design, consider how they’ll interact with the underlying fabric texture. For instance, delicate lace might require a soft pencil or hatching technique to capture its intricate pattern. Ruffles can be achieved using loose, expressive brushstrokes or layered lines to convey their volume.
To create realistic textures, study photographs of the embellishments you’re trying to draw. Observe how light falls on them and how they interact with other fabrics. You can also experiment with different materials – for example, tracing paper or vellum – to achieve the right texture and sheen.
When drawing beading or sequins, use short, sharp lines to capture their sparkle. Consider using a fine-tip pen or marker to create precise details. For more complex patterns like brocade or embroidery, break them down into smaller components and focus on capturing each element’s unique texture and shape. Practice drawing these embellishments separately before incorporating them into your dress design to ensure you can replicate the look accurately.
Advanced Techniques for Fashion Illustration
Now that you’ve mastered the basics of drawing a dress design, it’s time to elevate your skills with more complex techniques and styles. From layering fabrics to creating movement and texture, we’ll explore advanced methods to enhance your illustrations.
Using Color and Contrast
When selecting colors for your fashion illustration, consider the mood and theme you want to convey. For example, a romantic gown might feature soft pastels, while a modern evening dress could be rendered in bold jewel tones. A cohesive palette can help tie together disparate elements of your design.
To create visual interest, vary the values – lightness or darkness – within your composition. This can be achieved by using different shades and tints of the same color, or by incorporating neutral backgrounds to allow your main elements to pop. For instance, a bright floral print might be placed against a soft gray background to make it stand out.
In terms of composition, balance warm and cool colors to create visual harmony. Warm colors like reds and oranges tend to advance in space, while cool colors like blues and greens recede. Experiment with placing warm elements on the right or bottom of your composition to draw the viewer’s eye through the design. By carefully balancing color and contrast, you can create a fashion illustration that is both visually appealing and communicates the essence of your dress design.
Incorporating Movement and Energy
To convey movement and energy in your dress drawings, focus on capturing the flow and drape of fabric. Study how different fabrics behave when draped over a mannequin or a model. Observe how folds form, where creases occur, and how fabric hangs from the body. For example, flowing chiffon drapes elegantly around the curves of the figure, while stiff organza forms crisp folds.
When depicting volume, consider the way fabric fills out the silhouette. Use gentle lines to suggest softness, and more defined strokes for structure. Pay attention to where fabric gathers or bunches, as these areas can create dynamic interest in your drawing. To add movement to your dress drawings, experiment with loose brushstrokes or expressive line work that suggests fluidity.
Incorporate subtle suggestions of energy through the placement of folds, pleats, and other details. Avoid overly realistic renderings, which can come across as static. Instead, aim for a balance between accuracy and creative interpretation. Remember, your goal is to evoke the feeling of movement and life in your dress drawings, not merely to reproduce the garment itself.
Frequently Asked Questions
Can I use digital drawing tools to create fashion illustrations?
Yes, many artists prefer using software like Adobe Illustrator or Procreate for their fashion illustration work. These tools offer precise control over lines and shapes, making it easier to achieve accurate proportions and details.
How do I know when a dress design is ‘done’?
A completed dress design should balance proportion, silhouette, and embellishments effectively. If your drawing still looks unbalanced or has awkward proportions, revisit the basic shapes and proportions section of our guide for further refinement.
What if my fashion illustration doesn’t look ‘fashion-forward’ enough? How can I modernize it?
To give your designs a modern twist, consider experimenting with bold color palettes, innovative textures, or avant-garde silhouettes. You can also draw inspiration from current fashion trends and incorporate them into your illustrations.
Can I use real-life photos of dresses to help me draw more accurately?
Using reference images is an excellent way to improve your drawing skills. However, be cautious not to simply copy the image; instead, focus on breaking down the dress into its basic shapes and proportions, then add details and embellishments with your own artistic touch.
How do I incorporate subtle fabric texture and draping effects in my drawings without making them look too busy?
To achieve realistic fabric textures and draping effects, practice layering thin lines or hatching techniques to suggest the folds and creases of the fabric. Focus on capturing the subtleties of light and shadow to create depth and dimensionality in your illustrations.