Capturing the dynamic movement of oceanic waves on paper can be a challenging yet rewarding experience for artists. Whether you’re an aspiring illustrator or simply looking to improve your observational skills, learning how to sketch waves is a valuable skill that requires attention to detail and a deep understanding of waveforms. Wave patterns, shapes, and textures are all essential elements in creating realistic depictions of oceanic movements. By mastering these techniques, you’ll be able to accurately convey the energy and power of waves in your artwork. This guide will walk you through the fundamentals of sketching waves, including measuring techniques for accurate proportions and advanced drawing methods for capturing intricate wave patterns.
Understanding Waveforms and Basics
When sketching waves, a solid understanding of waveforms is essential, so let’s start by exploring the fundamental patterns that make up different types of waves. We’ll break down these basics to help you build a strong foundation for your sketches.
Defining Waves and Their Types
Waves are a fundamental aspect of our natural world, and understanding their types is essential for accurate sketching. At its core, a wave is a disturbance that transfers energy through a medium, such as water or air. This definition encompasses various types of waves, including ocean waves, sound waves, and even light waves.
To better grasp the concept, let’s break down some key categories: periodic waves, which repeat at regular intervals; non-periodic waves, like those caused by earthquakes; and mechanical waves, where energy is transferred through a physical medium. Ocean waves, for instance, are typically classified as surface waves or body waves, depending on their direction of travel.
Understanding the types of waves helps you recognize their unique characteristics. For example, sound waves have distinct frequencies and amplitudes, while light waves exhibit properties like wavelength and diffraction. By acknowledging these differences, you’ll be able to accurately depict various waveforms in your sketches. When observing or sketching waves, it’s essential to note their type and behavior, as this will inform your drawing style and attention to detail.
Basic Drawing Tools and Materials
When it comes to sketching waves, having the right tools and materials is essential. You’ll want a range of pencils with varying hardness levels, such as HB, 2B, and 6B, for creating different line weights and textures. A set of fine-tip pens or markers can also be useful for adding details and defining waveforms. Look for brands like Faber-Castell, Tombow, or Copic, which offer high-quality art supplies.
In addition to these drawing tools, you’ll need a suitable surface to work on. Choose a paper with a smooth texture, such as hot press watercolor paper or vellum, which will help prevent the pencil lead from digging in too deeply. A range of erasers is also crucial for correcting mistakes and creating subtle transitions between values.
When selecting materials, consider investing in a good quality sketchbook or journal that can withstand repeated use and erasure. Some artists prefer to work on loose sheets of paper, while others prefer the convenience of a bound book. Ultimately, the choice will depend on your personal preference and working style.
Measuring and Observing Waves
To accurately capture the essence of a wave, it’s essential to understand its various components, including height, period, and wavelength. Let’s break down how to measure these crucial elements.
Understanding Wave Height, Length, and Period
Accurate measurements of wave height, length, and period are essential for creating realistic and effective sketches. To measure these parameters, you can use simple techniques and instruments like a ruler and a stopwatch.
To measure wave height, place the end of a ruler at the trough (the lowest point) of the wave and read the measurement where the crest (the highest point) meets the ruler. Repeat this process several times to ensure an accurate average measurement. A general rule of thumb is to take multiple measurements from different sections of the wave.
Wave length, or wavelength, is typically measured between two consecutive peaks or troughs. Use a ruler or measuring tape to measure the distance between these points. Make sure to measure at right angles to the wave direction for accuracy.
The period of a wave refers to the time it takes for one complete cycle to pass by. To measure this, use a stopwatch to record the time between two consecutive peaks or troughs. Take multiple measurements and calculate an average to ensure accuracy. Having accurate measurements of these parameters will help you create more realistic and detailed sketches of waves.
Observe and Record Wave Patterns
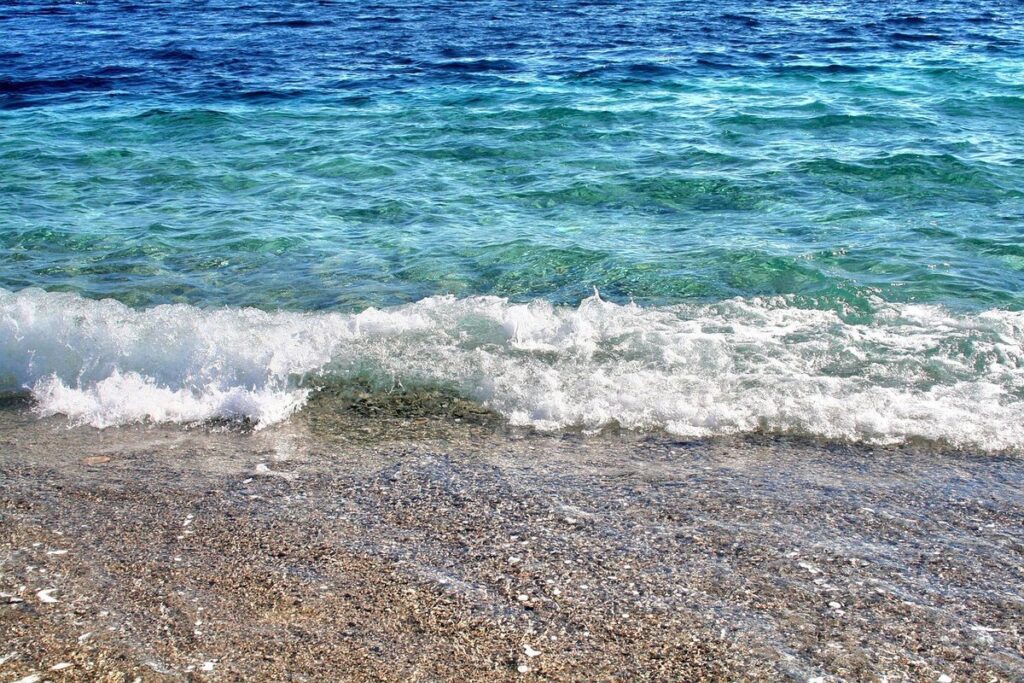
When observing and recording wave patterns, pay attention to their unique characteristics. Breaking waves, for instance, tend to be more turbulent with foamy crests and a white-water wash. In contrast, crashing waves are often marked by a sudden collapse of the crest, creating a dramatic splash. Calm waters, on the other hand, exhibit gentle undulations with minimal foam or spray.
To capture these patterns in your sketches, observe the wave’s behavior from various vantage points. Note the angle and position of the sun, as it can greatly affect how light interacts with the water. Take note of the surrounding environment: is the shoreline rocky, sandy, or steep? This context will help you convey the wave’s energy and movement.
When recording wave patterns, focus on capturing their dynamic flow. Use loose brushstrokes or gestural lines to suggest the waves’ motion. Consider using a range of values – from light to dark – to convey the varying textures and intensities of each pattern. By observing and accurately rendering these wave patterns, you’ll be able to convey the essence of the scene in your sketches.
Basic Sketching Techniques
To get started with sketching waves, let’s master some fundamental techniques that will make your drawings look more realistic and engaging. You’ll learn how to create smooth curves and dynamic movement in this essential section.
Gesture Drawing and Expressive Lines
To capture dynamic wave movements on paper, start by employing basic gesture drawing techniques. Hold your pen or pencil loosely and make quick, confident strokes to suggest the flow of water. Focus on conveying energy and movement rather than precise details. Vary line weight and texture to create visual interest – a thicker line can indicate a more turbulent area, while a softer stroke might suggest a calmer section.
Experiment with expressive lines that mimic the curves and twists of the wave. Practice drawing wavy lines with your non-dominant hand or while looking away from your paper to loosen up your movements. This will help you tap into your subconscious drawing skills and capture the dynamic essence of waves more naturally.
Pay attention to where and how you apply pressure when drawing – a sharp, pointed line can indicate foam or spray, while a smooth, curved line might suggest the surface tension of water. Remember that gesture drawing is about capturing movement and energy rather than creating realistic representations. By embracing loose, expressive lines, you’ll be able to convey the fluid motion of waves in a more engaging way.
Simplifying Forms and Shapes
When simplifying complex wave forms into basic shapes, it’s essential to maintain their essence while stripping away unnecessary details. This is achieved by identifying key features and using simple geometric shapes to convey them. For instance, a breaking wave can be reduced to an arcing curve that suggests the flow of water over the crest.
By focusing on the overall shape and movement, you can create a more dynamic and expressive sketch. Consider a wave’s leading edge as a curved line that tapers into the ocean’s surface, or its face as a series of concentric curves that evoke the movement of water.
Successful simplification is not about eliminating details entirely but about emphasizing what matters most to the overall composition. For example, you might use short, dynamic lines to suggest foam and spray while reserving smooth arcs for the wave’s body. This approach helps to create a sense of energy and fluidity in your sketch, making it more engaging and visually appealing.
In practice, try sketching waves using simple shapes like circles, ellipses, or ovals to capture their rounded forms.
Advanced Techniques and Refining Skills
Now that you’ve mastered the fundamentals, it’s time to take your wave sketching skills to the next level by learning advanced techniques and refining your craft with precise lines and textures.
Capturing Wave Details and Texture
When sketching waves, capturing intricate details can elevate your artwork from a basic representation to a visually stunning piece. One way to achieve this is by paying close attention to foamy crests, spray, and water droplets. These elements not only add visual interest but also convey the dynamic movement of the waves.
To capture these details, experiment with using a range of line weights and textures. For example, use a fine-tip pen or pencil to draw delicate spray patterns or water droplets on the wave’s surface. Alternatively, try using a brush to create soft, feathery textures that suggest the foamy crests.
Achieving texture is crucial when sketching waves, as it helps convey the sense of movement and energy. You can use various tools and methods to achieve this, such as hatching, cross-hatching, or stippling with a range of mediums like graphite, charcoal, or ink. For instance, using a tortillon to blend graphite strokes can create smooth, gradient-like textures that suggest the wave’s surface.
When experimenting with texture, remember to balance detail and simplicity. A good rule of thumb is to focus on capturing the overall shape and movement of the waves, while reserving detailed textures for specific areas where they will have the most impact.
Experimenting with Media and Effects
Experimenting with different media and effects can elevate your wave sketches from simple representations to visually striking pieces. When working with ink, try layering multiple washes to achieve a sense of depth and texture. For example, start by sketching the basic shape of the wave with a fine-tip pen, then use a brush to add loose, gestural strokes that suggest movement.
Watercolor is another excellent medium for capturing the soft, ethereal quality of waves. Use a wet-on-wet technique to blend colors together, creating subtle gradations of tone and value. To enhance your watercolor wave sketches, experiment with different brushstrokes, such as drybrushing or scrubbing, to introduce texture and visual interest.
Don’t be afraid to get creative with effects like blending or layering media. For instance, you can use a fixative to set ink washes in place before adding additional layers, allowing for intricate details and subtle nuances. Remember that the goal is to capture the dynamic movement of waves, so don’t worry too much about perfection – focus on conveying energy and movement through your chosen medium.
Practice and Refining Your Skills
Now that you’ve learned the fundamentals of sketching waves, it’s time to put your skills into practice and refine them further through regular drawing exercises. This is where the real improvement happens!
Exercises for Developing Muscle Memory
To develop muscle memory for drawing waves, start with simple exercises that focus on basic forms and gestures. Repeat these actions several times to commit them to long-term memory. For example, practice drawing a continuous wavy line by moving your pen or pencil in a smooth, flowing motion. Focus on the sensation of your writing instrument gliding across the paper.
Next, try drawing a series of connected waves using simple shapes like curves and arcs. Practice drawing each wave with varying heights and widths to develop an understanding of their relationships. You can also practice drawing specific wave patterns, such as breaking waves or swells.
To further challenge yourself, try combining different gestures and forms in a single exercise. For instance, draw a wavy line while incorporating simple shapes like triangles or squares to create texture and interest. Repeat these exercises regularly, ideally with a consistent tool and paper quality, to reinforce your muscle memory and improve your wave-drawing skills.
Overcoming Challenges and Common Issues
Capturing movement and accurately rendering water are often the most challenging aspects of sketching waves. To overcome these challenges, it’s essential to focus on conveying energy and dynamism through gesture drawing. Use expressive lines and loose brushstrokes to suggest the movement of the wave, rather than trying to render every detail.
When rendering water, consider the texture and pattern of the surface. Focus on capturing the play of light on the water, as this can help create a sense of depth and dimensionality. Remember that waves are not just smooth, flowing curves – they often have irregular edges and rough textures that add visual interest.
Another common issue is dealing with uncertainty when sketching waves. You may struggle to capture the precise shape or movement of the wave, especially if you’re working from observation rather than reference images. To overcome this, practice sketching waves in different conditions – such as at dawn or dusk when the light is soft and diffused – and experiment with different media and techniques.
In particular, try using a range of line weights to suggest depth and dimensionality, and don’t be afraid to simplify complex forms into basic shapes. By focusing on capturing the essence of the wave rather than its precise details, you can create more dynamic and engaging sketches that convey the energy and movement of the ocean.
Bringing Your Wave Sketches to Life
Now that you have mastered the basics of sketching waves, it’s time to take your drawings to the next level by learning how to add movement and texture.
Incorporating Context and Storytelling
Adding context and storytelling elements to your wave sketches can elevate them from simple representations of water to immersive visual narratives. When depicting a wave scene, consider the atmosphere and mood you want to convey. A serene coastline at dawn might call for soft, feathery brushstrokes and pale colors, while a dramatic stormy sea would require bold, expressive lines and vibrant hues.
To create an engaging narrative, think about the relationships between the elements in your composition. For example, how does the wave interact with the surrounding landscape? Are there any figures or objects within the scene that add a sense of scale or purpose?
Some practical tips for incorporating context and storytelling into your wave sketches include:
- Pay attention to light and shadow: How do they affect the mood of the scene?
- Use color and texture to evoke emotions: Cool blues can create a calming atmosphere, while rough textures might suggest turbulence.
- Consider including subtle details that hint at the story behind the scene, such as a fishing boat in the distance or a lone figure walking along the shore.
Displaying and Sharing Your Work
When you’ve completed a wave sketch that you’re proud of, it’s time to share it with others. Consider submitting your work to local art exhibitions, galleries, or group shows that focus on nature-inspired art. These events can provide valuable exposure and help you connect with like-minded artists.
Online platforms are also an excellent way to showcase your skills. Share your wave sketches on social media, using relevant hashtags to reach a broader audience. Websites like DeviantArt, ArtStation, or Behance can be great places to share your work and receive feedback from fellow artists. You can even create a portfolio website to display your best pieces.
Joining local art groups or clubs is another fantastic way to share your work and learn from others. These communities often host exhibitions, workshops, and critiques that can help you improve your skills and gain confidence in sharing your art. Don’t be afraid to participate in online forums or discussion groups dedicated to wave sketching or nature art. Sharing your work with others not only helps you grow as an artist but also allows you to connect with people who appreciate the beauty of waves.
Conclusion
As you’ve now mastered the art of sketching waves, it’s essential to remember that practice makes perfect. The more you draw, the more comfortable you’ll become with capturing wave shapes and movements on paper. To further refine your skills, try sketching different types of waves, such as ocean swells, wind-driven waves, or even man-made waves like those found in swimming pools. Consider also experimenting with various mediums, like pencils, pens, or even digital drawing tools.
Keep in mind that the key to successfully capturing waves is not just about replicating their shape but also conveying their energy and movement. To achieve this, focus on using expressive lines, varying line weights, and incorporating subtle texture and pattern suggestions. With consistent practice and attention to these details, you’ll be able to create visually striking wave sketches that transport viewers to the ocean’s edge.
Frequently Asked Questions
Can I use digital drawing tools to sketch waves?
Yes, you can use digital drawing tools like graphics tablets or software like Procreate or Adobe Illustrator to capture wave movements and textures. Digital tools offer flexibility in experimenting with different media and effects, such as layering and blending, which can add depth and visual interest to your sketches.
How do I know when my wave sketch is capturing the energy of the movement?
When observing your wave sketch, look for expressive lines, varied line weights, and textured areas that convey a sense of dynamic movement. Pay attention to how these elements interact with each other to create a sense of flow and energy. If you’re unsure, try revisiting the basic gesture drawing techniques discussed in the article and practice capturing wave movements with simple, fluid strokes.
What if I’m struggling to capture intricate wave details like foamy crests or spray?
Capturing intricate wave details requires patience and attention to texture. Start by observing the wave patterns and textures you want to replicate, then experiment with different tools and techniques (e.g., using a fine-tip pen for details or layering watercolors) to achieve the desired effect. Practice simplifying forms into basic shapes while maintaining their essence, as described in the article’s section on basic sketching techniques.
How do I share my wave sketches online if they’re not perfect?
Don’t be too hard on yourself! Wave sketching is a skill that takes practice, and sharing your work online can help you refine it. Consider joining online communities or forums dedicated to art and drawing, where you can showcase your work and receive constructive feedback from others. Remember that even professional artists share their process and imperfections with their audience.
Can I use watercolor or other media to capture wave textures and patterns?
Yes, experimenting with different media like watercolor, ink, or mixed media can add unique texture and visual interest to your wave sketches. When working with these mediums, focus on capturing the essence of wave movement and pattern rather than precise accuracy. Use techniques like blending, layering, or dripping to achieve intricate textures that evoke the dynamic movement of waves.