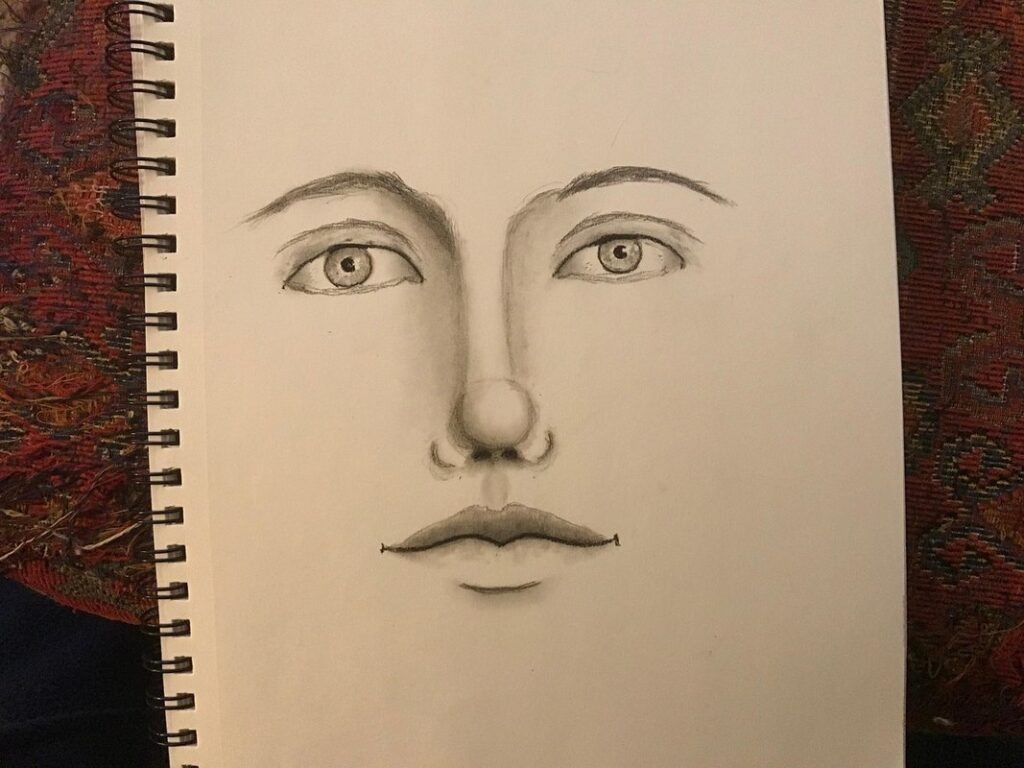
Drawing a nose can be one of the most challenging aspects of portrait drawing, but with the right techniques and understanding of anatomy, you’ll be able to capture realistic shapes and expressions in no time. Many artists struggle to draw noses that look proportional to the rest of the face or accurately convey emotions through subtle shape changes. But what if you could master the art of drawing a nose easy? A well-drawn nose can make all the difference in bringing your drawings to life, conveying character and personality with just a few subtle nuances. In this article, we’ll take you step-by-step through the process of drawing a nose easy, covering anatomy, proportions, and advanced techniques to help you capture realistic shapes and expressions. By the end of this guide, you’ll be able to draw a nose that looks as if it was drawn by a seasoned artist.
Understanding Nose Anatomy
Let’s start by examining the basic structure of the nose, which consists of several key features that you’ll want to accurately capture. These include the bridge, nostrils, and nasal cavity.
Recognizing Key Features
When drawing a nose, it’s essential to get the proportions right. Start by identifying the bridge of the nose, which is the slight indentation between the eyes and the tip of the nose. This area should be slightly curved, with the highest point being about one-third of the way down from the root of the nose. The tip of the nose is typically rounded or slightly pointed, depending on the individual’s features.
The nostrils are another crucial feature to capture. They’re usually set back a bit from the edge of the nose and should be roughly half as deep as they are wide. Pay attention to their shape, too – some people have relatively straight nostril edges, while others have more rounded or slightly flared ones.
Proportions are key when drawing a nose, but facial structure also plays a significant role. Consider the overall shape of the face and how it relates to the nose’s position and size. A good starting point is to draw a vertical line down from the center of the eye, as this will help you place the bridge of the nose correctly in relation to the rest of the face.
Analyzing Reference Images
When studying reference images of noses, it’s essential to examine them from various angles and perspectives. Look for images that showcase the nose from the front, side, and three-quarter views. Observe how the shape and contours change with each angle.
Notice the subtle differences between the nostrils’ position, size, and shape. Some noses have larger alar lobes, while others have more pronounced nasolabial folds. Take note of these variations to get a better sense of the nose’s natural range.
Pay attention to how light falls on the nose in different images. Notice how shadows highlight or hide specific features, like the bridge or tip. This will help you understand how to create realistic shading and dimensionality in your drawings.
Gather reference images with clear labels or annotations that identify key features. Use a measuring tool or grid paper to compare the size and proportions of different noses. By studying multiple reference images, you’ll develop a more nuanced understanding of nose anatomy and be better equipped to draw one accurately.
Basic Shapes and Proportions
To draw a nose, you’ll need to understand basic shapes like spheres and cylinders, as well as proportions that guide its overall structure. Let’s examine these fundamentals first.
Drawing the Nose Contour
Drawing the nose contour involves creating a smooth transition from the bridge to the tip. To achieve this, start by drawing a gentle curve from the top of the bridge to the tip. This curve should be subtle and not too pronounced, as it will help create a natural-looking shape. The key is to connect the two ends of the bridge with a soft, flowing line.
Think of it like a crescent moon shape, with the pointed end at the tip and the rounded end at the top of the bridge. This will help you establish the overall proportions of the nose. As you draw the curve, pay attention to its smoothness – a gentle, continuous motion is essential for creating a natural look.
Remember that the nostrils should be positioned on either side of the tip, slightly above and below it. To ensure proper placement, use the bridge as a guide and position the nostrils about one-third of the way down from the top of the nose. This will help create balance and harmony in your drawing.
Measuring and Dividing the Face
To accurately draw a nose, you need to know its correct placement on the face. Start by drawing a horizontal line across the middle of the face, using the eyes as guides. This line should be level with the tops of the eyebrows and about one-quarter of the way down from the hairline. Next, draw another horizontal line below this one, using the mouth and jawline as references.
The space between these two lines is where the nose will sit. You can also use the width of the eyes to gauge the size of the nose. For a more proportional approach, imagine a vertical line running from the top of each eye down to the chin. The nose should be roughly centered within this rectangle.
When drawing the nose itself, keep in mind that it’s slightly narrower at the tip than at the base. Use gentle curves and smooth lines to create a natural-looking shape. Remember, accurate placement is key to creating a believable nose.
Refining the Nose Shape
Now that you’ve established the basic nose shape, let’s refine it by adding subtle details to make your drawing look more realistic and pleasing. This will involve adjusting a few key proportions.
Creating Depth and Dimension
Shading plays a crucial role in creating depth and dimension on the nose. You’ll want to pay attention to the areas where light would naturally fall – the bridge of the nose tends to be lighter, while the sides and tip are often darker. Use gentle hatching or soft shading techniques to create a subtle gradient effect.
Highlighting can also help bring out the contours of the nose. Identify the highest points on the nose’s surface – typically, this is where the bridge meets the nostrils – and apply a small amount of highlight to these areas using a fine-tip brush or a white pencil. Be cautious not to overdo it; too much highlight can make the nose look unnatural.
Texture can add depth and interest to your drawing by suggesting the skin’s topography. Use short, curved strokes with a medium or rough tip brush to block in the general texture of the nose, then refine as needed. Avoid over-texturing – you want to imply the texture rather than explicitly stating it.
Refining the Nostrils and Tip
The nostrils and tip of the nose are critical details that can make or break a realistic drawing. When refining these areas, pay attention to the size and shape of the nostrils. In most cases, the right nostril is slightly larger than the left one, but this variation can be subtle. To achieve a more accurate representation, study the shapes and sizes of various nose profiles, taking note of how the nostrils interact with the surrounding skin.
Notice that the tip of the nose often curves slightly downward, creating a gentle slope from the bridge to the end. This subtle curve is essential for capturing a natural look, as an overly pointed or flat tip can detract from the overall realism. To refine your drawing’s tip, try sketching a series of soft curves, gradually decreasing in size as they approach the nostrils.
Pay attention to the placement of the nostrils, as well. They should be positioned slightly above the center line of the nose, with the right one usually being higher than the left. By paying attention to these small details and studying real-world examples, you’ll be able to create a more accurate and convincing nose shape in your drawings.
Advanced Techniques and Expressions
Now that you have mastered the basics of drawing a nose, let’s take your skills to the next level by exploring more advanced techniques and subtle expressions. This will add depth and character to your portraits.
Capturing Facial Expressions
When capturing different facial expressions through the nose, it’s essential to observe how the surrounding features change. A happy face tends to have a slightly raised tip and a more pronounced alar base, giving the nose a subtle lift upwards. In contrast, a sad or upset expression often results in a flatter, more compressed nose.
To convey emotions through your drawing of the nose, pay attention to the position of the nostrils. A smiling person typically has slightly open nostrils, while a frowning individual’s nostrils are usually pinched together. Notice how these changes affect the overall shape and proportions of the nose.
When drawing a nose with a more subtle expression, focus on creating a nuanced balance between the various features. For example, in a neutral face, the alar base is often slightly relaxed, and the tip is not as prominent as it would be in an expressive face. Practice observing these variations to better capture the essence of different emotions through your drawings.
Drawing Different Nose Types
Drawing different nose types requires an understanding of their unique characteristics, shapes, and proportions. Start by studying reference images of various facial profiles to get a sense of the subtle differences between each type.
For example, noses can be generally classified as straight, slightly upturned, or downturned. A straight nose is typically symmetrical with no significant deviation from the vertical plane. To draw one, pay attention to the bridge’s width and length, aiming for a smooth, curved line that follows the natural contours of the face.
In contrast, a slightly upturned nose has a gentle convex curve at the tip, giving it a faintly smiling appearance. To capture this, slightly rotate the end of the nose upwards while maintaining its overall proportions. A downturned nose, on the other hand, is characterized by a more pronounced depression at the bridge and tip.
When drawing different nose types, remember that subtlety is key. Avoid over-exaggerating any feature, as this can quickly render your drawing unconvincing. Instead, aim for a balanced, natural look by observing and replicating the nuances of each type.
Common Mistakes and Troubleshooting
We all make mistakes when trying to draw a nose for the first time, so let’s go over some common errors and how to fix them quickly. Don’t worry, it’s normal!
Identifying and Fixing Errors
When drawing a nose, it’s common for artists to make mistakes that can throw off the entire face. One of the most frequent errors is mismatched proportions – the nose might be too large or too small compared to the surrounding features. To identify this issue, compare your drawing with reference images and check if the nose is roughly one-third of the way down from the bridge of the eyes.
Another mistake artists make is in the shape of the nostrils. They can appear too narrow or too wide, disrupting the overall balance of the face. When fixing errors like these, focus on small adjustments – a few gentle tweaks to the proportions and shapes can have a significant impact.
To use reference images effectively, look for variations in nose shape and size among different populations. Compare your drawing with images from real-life portraits or studies from anatomy books. This will help you create a more nuanced understanding of how noses vary and improve your accuracy when drawing one.
Overcoming Drawing Challenges
Drawing the nose can be challenging, especially when trying to capture its subtle shapes and proportions. To overcome these difficulties, focus on observing the nose’s anatomy. Study how the bridge, tip, and nostrils relate to each other in terms of size and placement. This will help you develop a better sense of scale.
When capturing the bridge, think of it as a gentle curve that connects the forehead to the tip of the nose. Avoid making it too sharp or abrupt, as this can create an unnatural appearance. Instead, aim for a smooth transition between the bridge and the rest of the face.
To achieve accurate proportions, pay attention to the size of the nostrils in relation to the rest of the nose. Typically, the nostrils are about one-quarter to one-third the width of the nose’s tip. By getting this proportion right, you can create a more realistic and balanced appearance. Practice drawing different noses with varying bridge shapes and proportions to develop your skills and build confidence in your ability to draw a nose accurately.
Conclusion and Final Tips
Now that you’ve completed the step-by-step guide, we’ll summarize key takeaways and provide some final tips to help refine your drawing skills.
Recap of Key Concepts
Drawing a nose may seem daunting at first, but by mastering its basic shape and proportions, you’ll find it becomes more manageable with practice. The key concepts covered in this guide – such as defining the nostrils, creating a bridge, and refining the tip – are crucial to achieving a believable nose.
To recap, remember that the nose is typically slightly off-center on the face, with the left side often being slightly shorter than the right. When drawing from life or using reference images, pay attention to these subtle asymmetries as they greatly impact facial harmony. Practice observing and rendering different types of noses – flat, prominent, upturned, or downturned – to develop your skills.
As you continue to practice drawing a nose, focus on combining the basic shapes (spheres, cylinders, and cones) with soft lines and gentle transitions between features. Refine your understanding of facial anatomy by exploring the relationships between the eyes, eyebrows, mouth, and nose. By consistently practicing these key concepts and parting tips, you’ll develop your skills and become more confident in drawing a believable nose.
Encouragement to Keep Practicing
Mastering the art of drawing a nose is not something that happens overnight. It takes time and patience to develop the skills needed to create a realistic and believable nose. You may find that you’re able to draw the basics well, but struggle with adding details or capturing the subtleties of facial expressions.
That’s okay – it’s all part of the learning process. Remember that even professional artists spent countless hours honing their craft before achieving mastery. The key is to keep practicing regularly and don’t be afraid to make mistakes along the way. With each attempt, you’ll refine your technique and develop a sense of what works and what doesn’t.
Consider breaking up your practice sessions into shorter intervals with specific goals in mind. For example, focus on drawing just the nose itself for 10-15 minutes before moving on to adding facial features or expressions. This will help you build confidence and improve your skills more efficiently. With persistence and dedication, you’ll be able to draw a nose that looks natural and authentic in no time.
Frequently Asked Questions
What if I’m still struggling to capture realistic nostril shapes and sizes?
Start by observing reference images of noses from different angles and perspectives. Pay attention to the way the nostrils curve and the size of the opening. Practice drawing simple shapes, like circles or ovals, to get a sense of the proportions. As you refine your skills, you can move on to more complex forms.
Can I draw a nose that’s significantly different from my own?
Yes. While it’s helpful to study reference images and understand the basic anatomy, you can draw noses that are unique and not representative of your own features. Think about the character or model’s facial structure and how their nose fits into it. Experiment with different shapes, sizes, and proportions to capture the individuality of each subject.
How do I know when a nose is “drawn correctly”?
A well-drawn nose should be proportional to the face and reflect the character’s unique features. Check that the bridge, tip, and nostrils are in balance, and that the shape and size fit the overall facial structure. If you’re unsure, study reference images or seek feedback from others who can provide an objective perspective.
What if I’m not good at capturing subtle nuances in nose shape and form?
Practice drawing noses with varying levels of detail. Start by focusing on basic shapes and proportions, then gradually add more subtlety as you become more comfortable with the subject matter. Study reference images of noses from different angles and perspectives to get a sense of how they change and adapt to the surrounding facial features.
Can I use this guide to draw noses for characters or models with very unique or exotic features?
Yes. While the guide provides general principles for drawing noses, you can apply these concepts to a wide range of subjects and styles. Think about how their nose fits into their overall facial structure and adapt your drawing accordingly. Be sure to observe reference images and study the way different features interact with one another.